
Post was last updated on 12/17/2025.
Ever wanted to take your bike with you when you embark on your transit commute? Well in many cases, you can! Many transit agencies have equipped their buses with bike racks, which allow for easy transport of your bike when going from A to B. Additionally, many transit agencies no longer require you to have a special permit to use this service.
In this episode of Transit 101, I’ll show you how easy it can be to bring your bike with you while riding the bus or train.
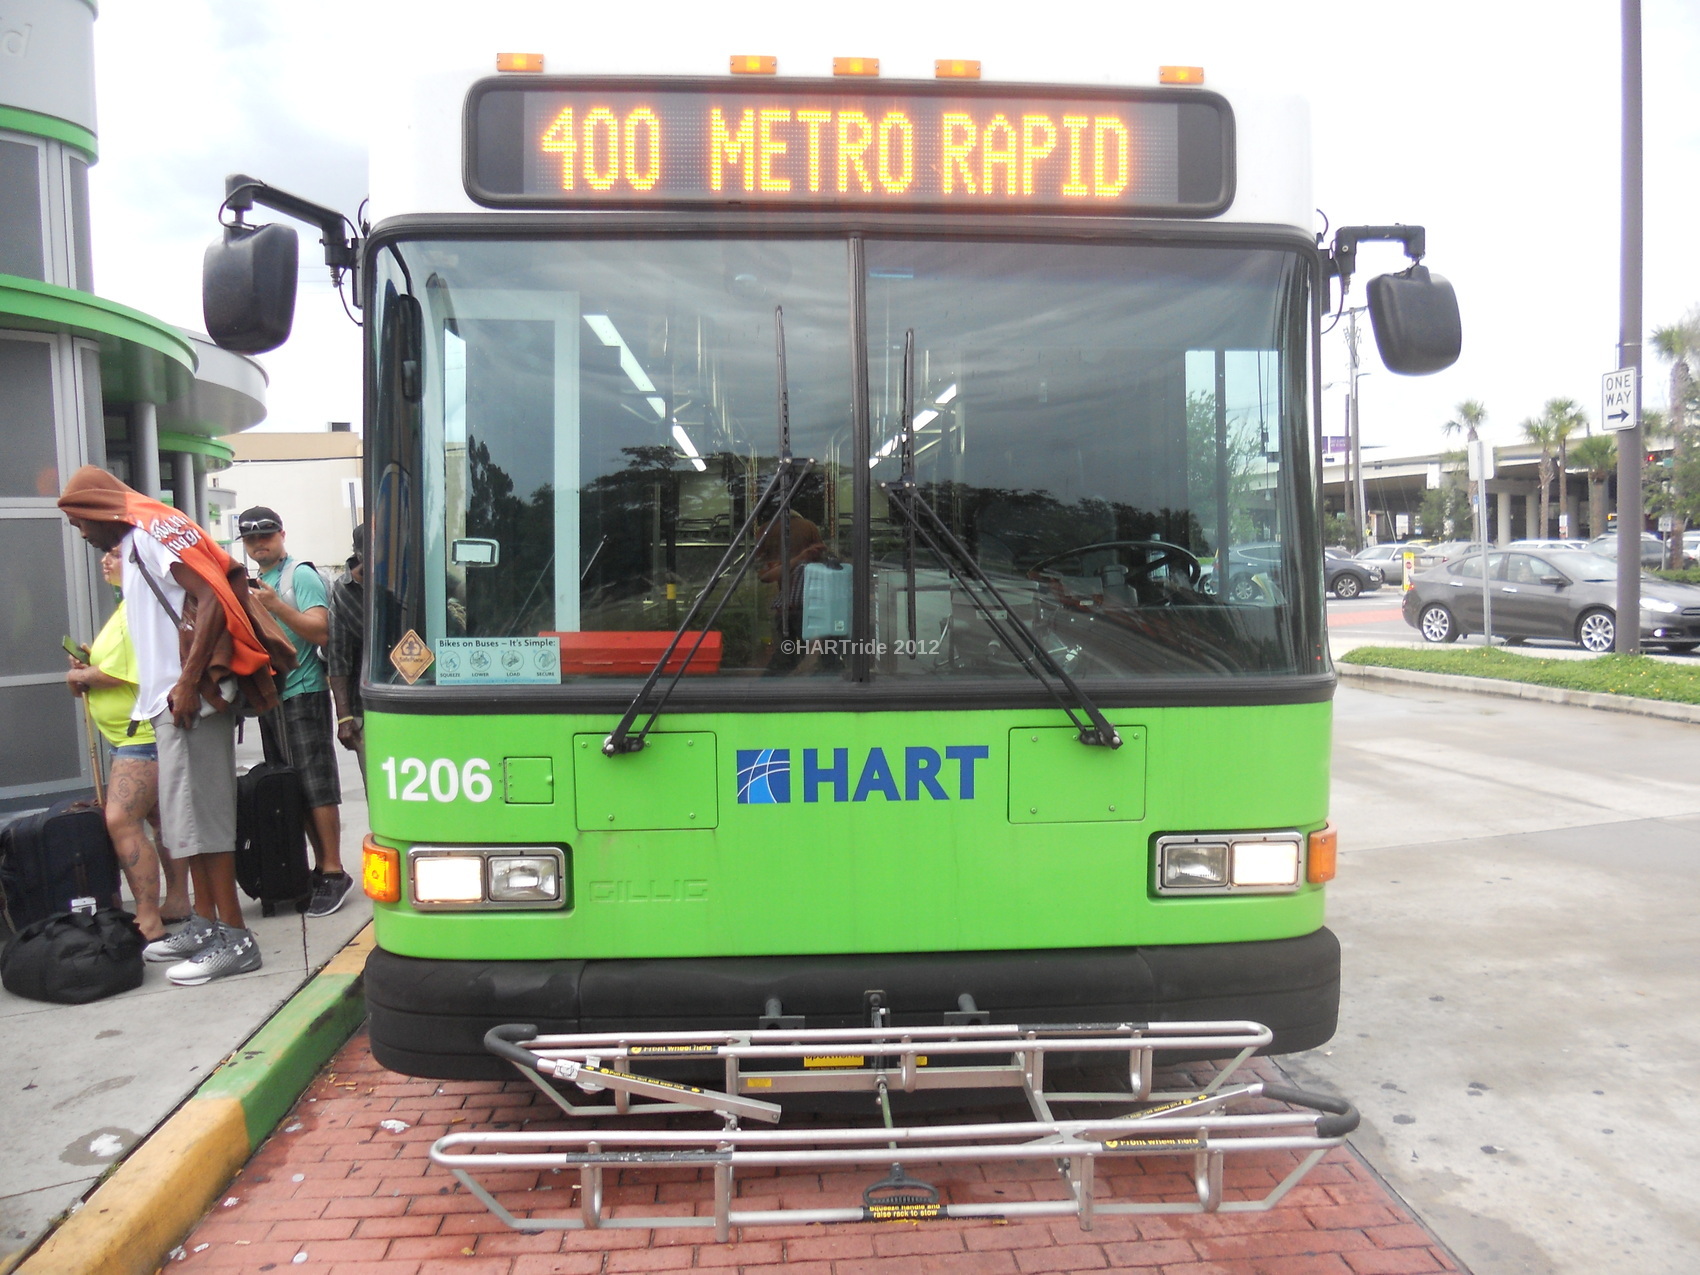
Bikes on Buses
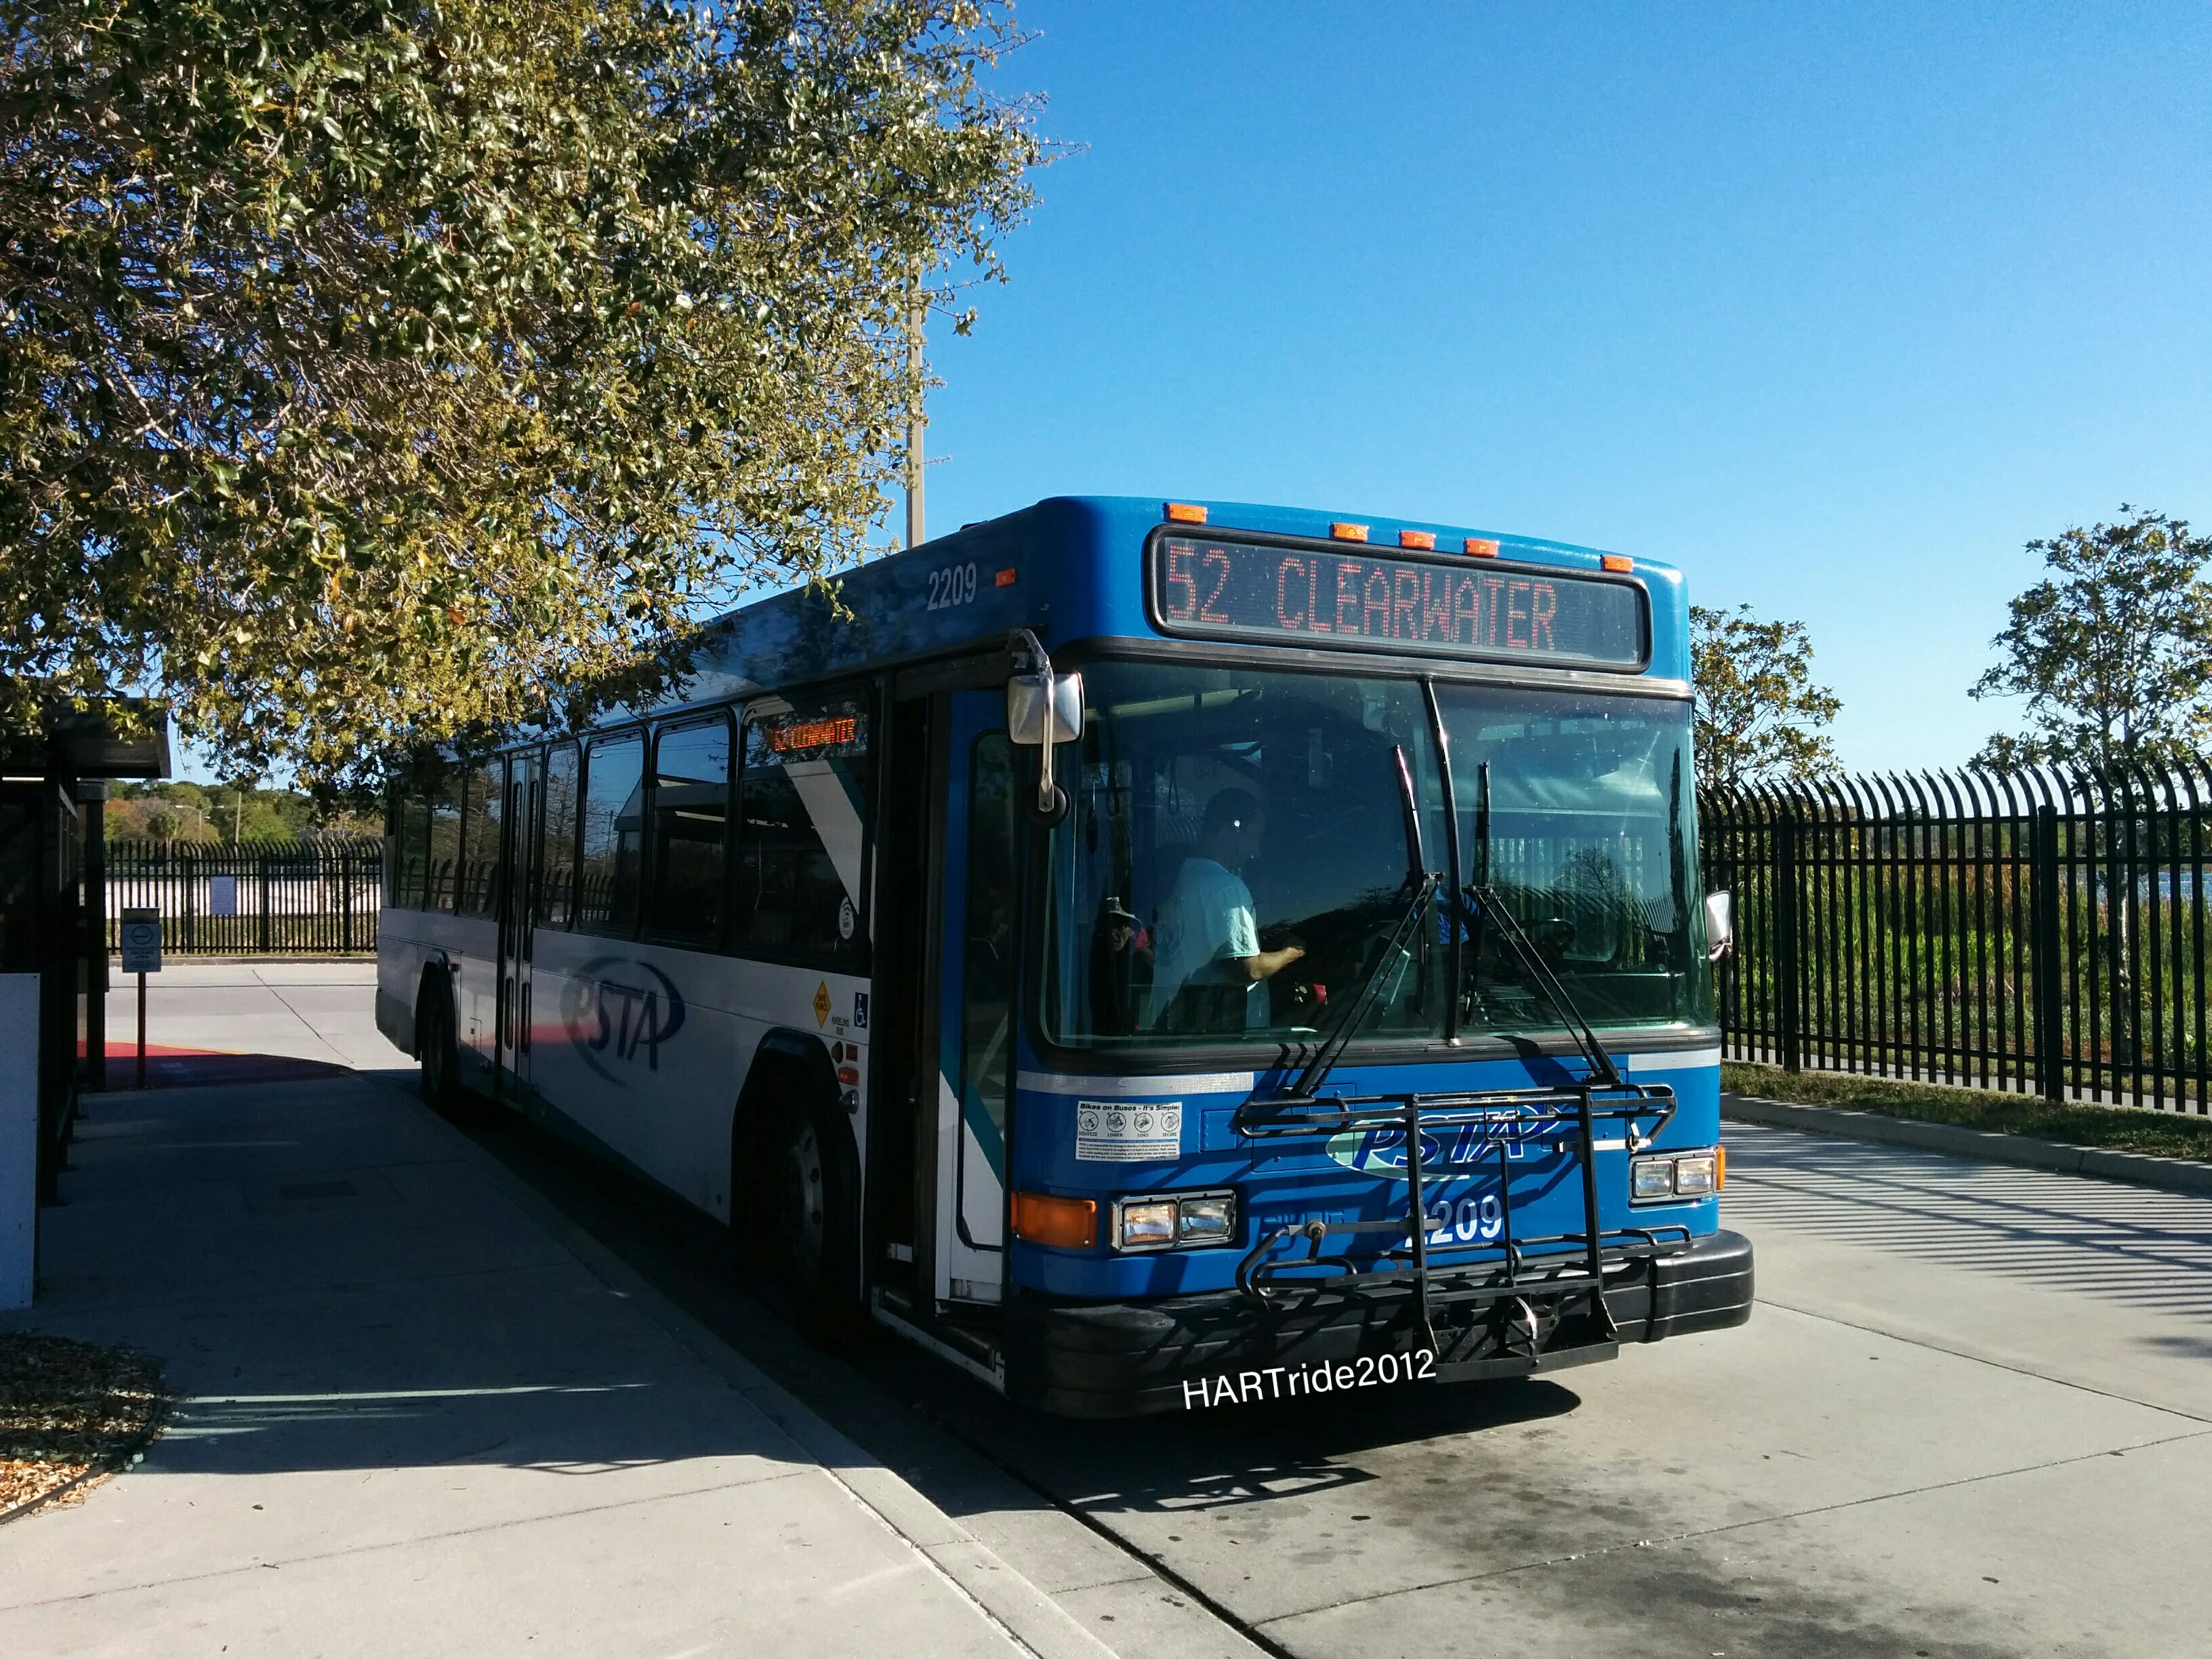
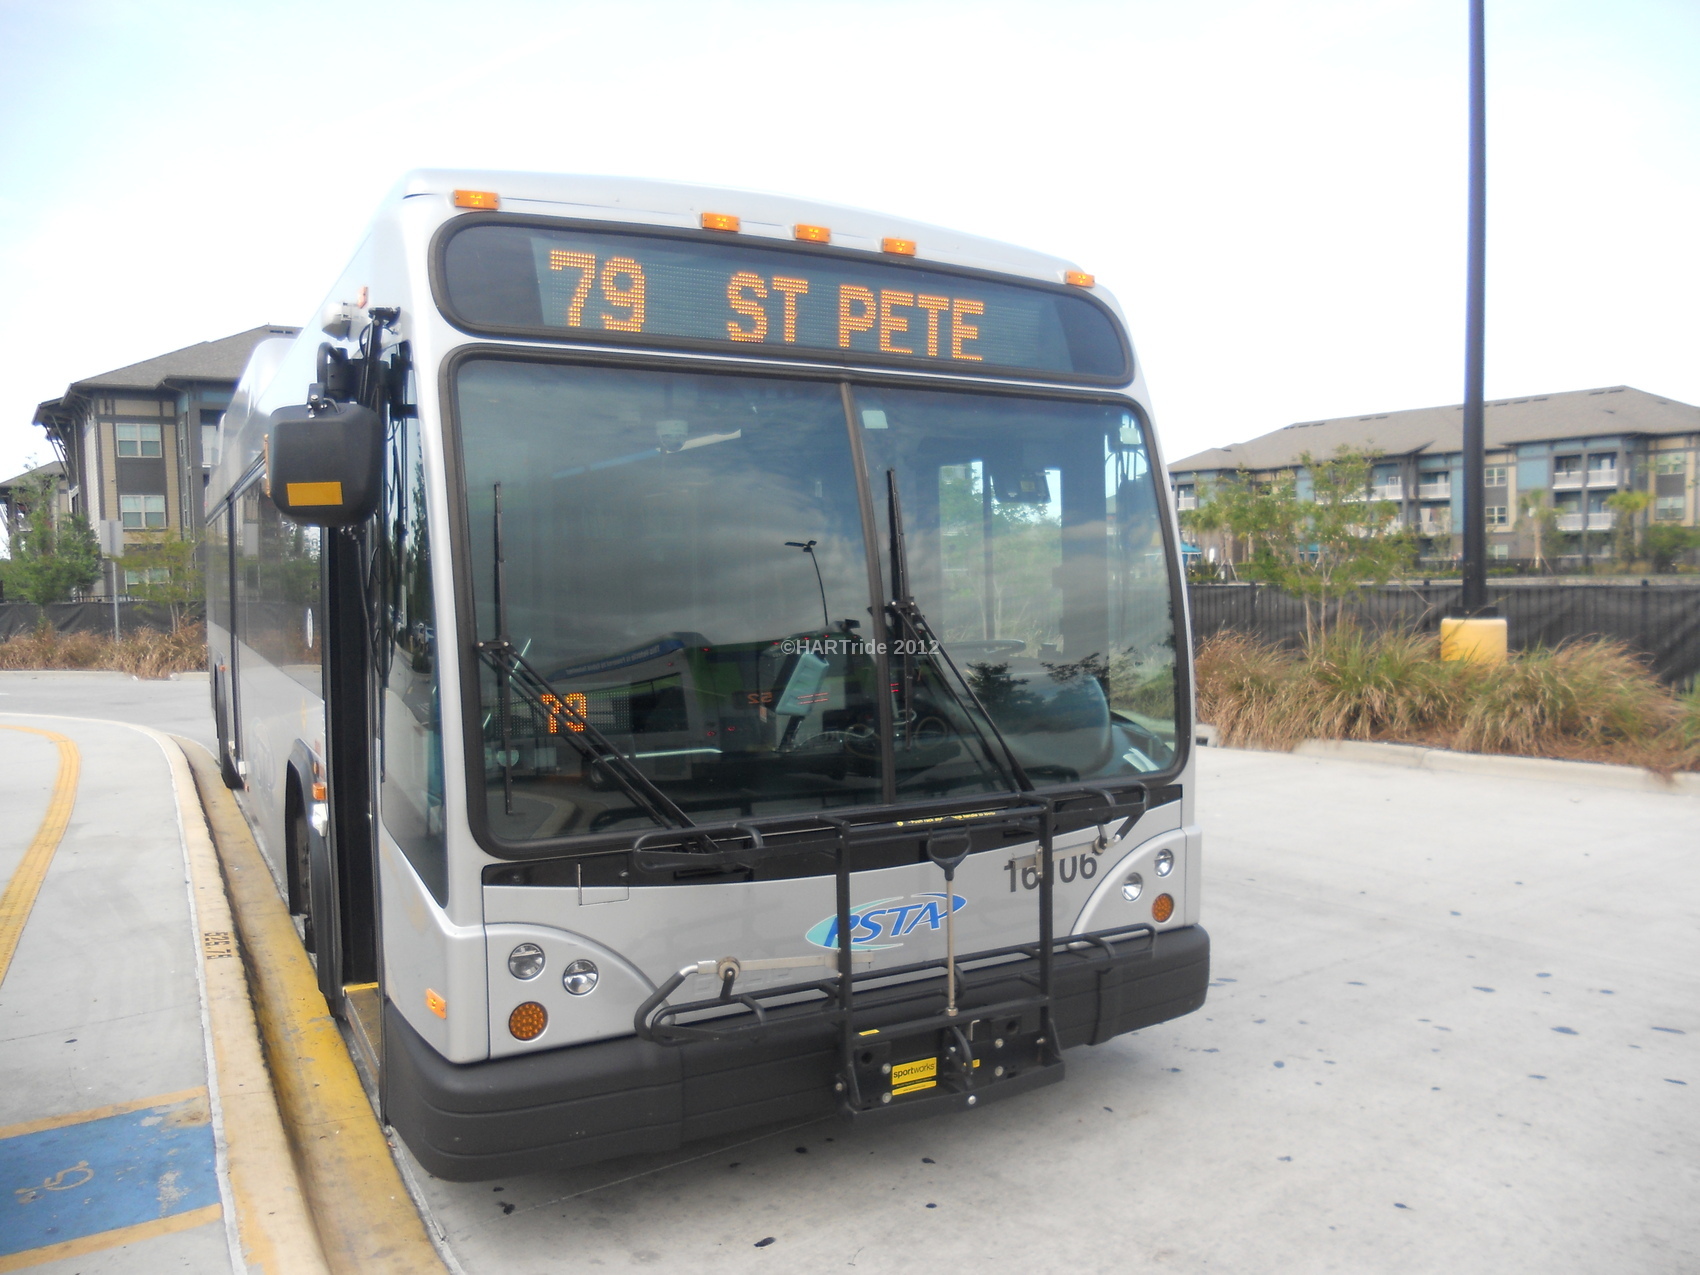
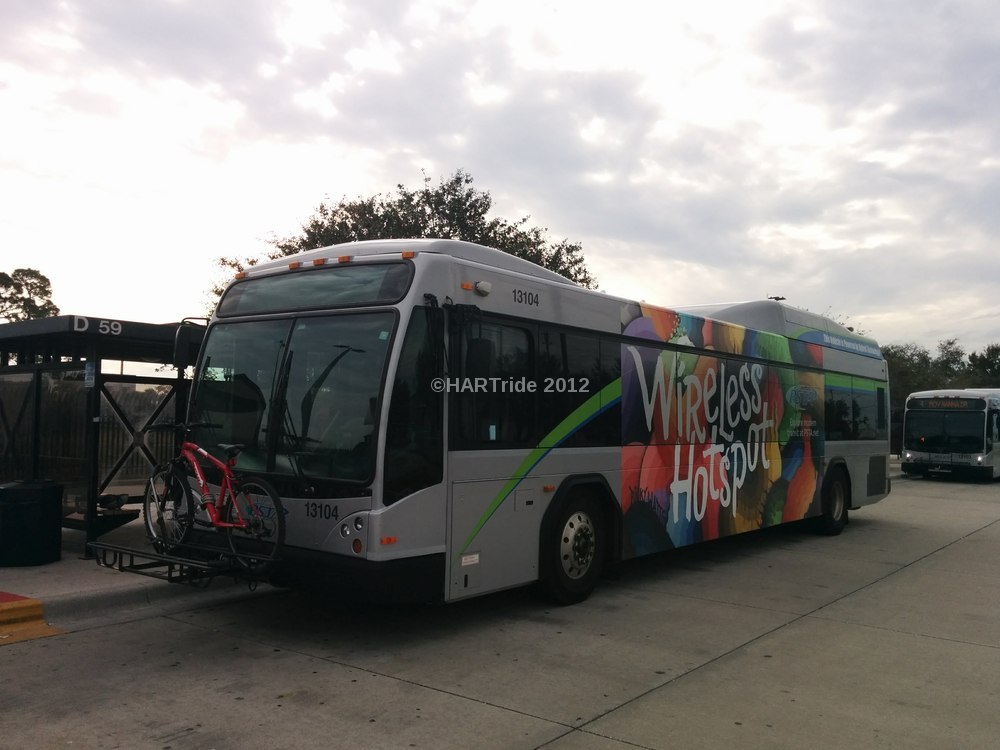
As I mentioned a moment ago, many transit agencies have equipped their buses with bike racks. While many agencies use racks that can accommodate two bikes, some agencies use racks that can accommodate three. The way that the racks look may vary based on the supplier that the transit agency uses, but a wide array of bikes can be accommodated regardless of the type of rack used.
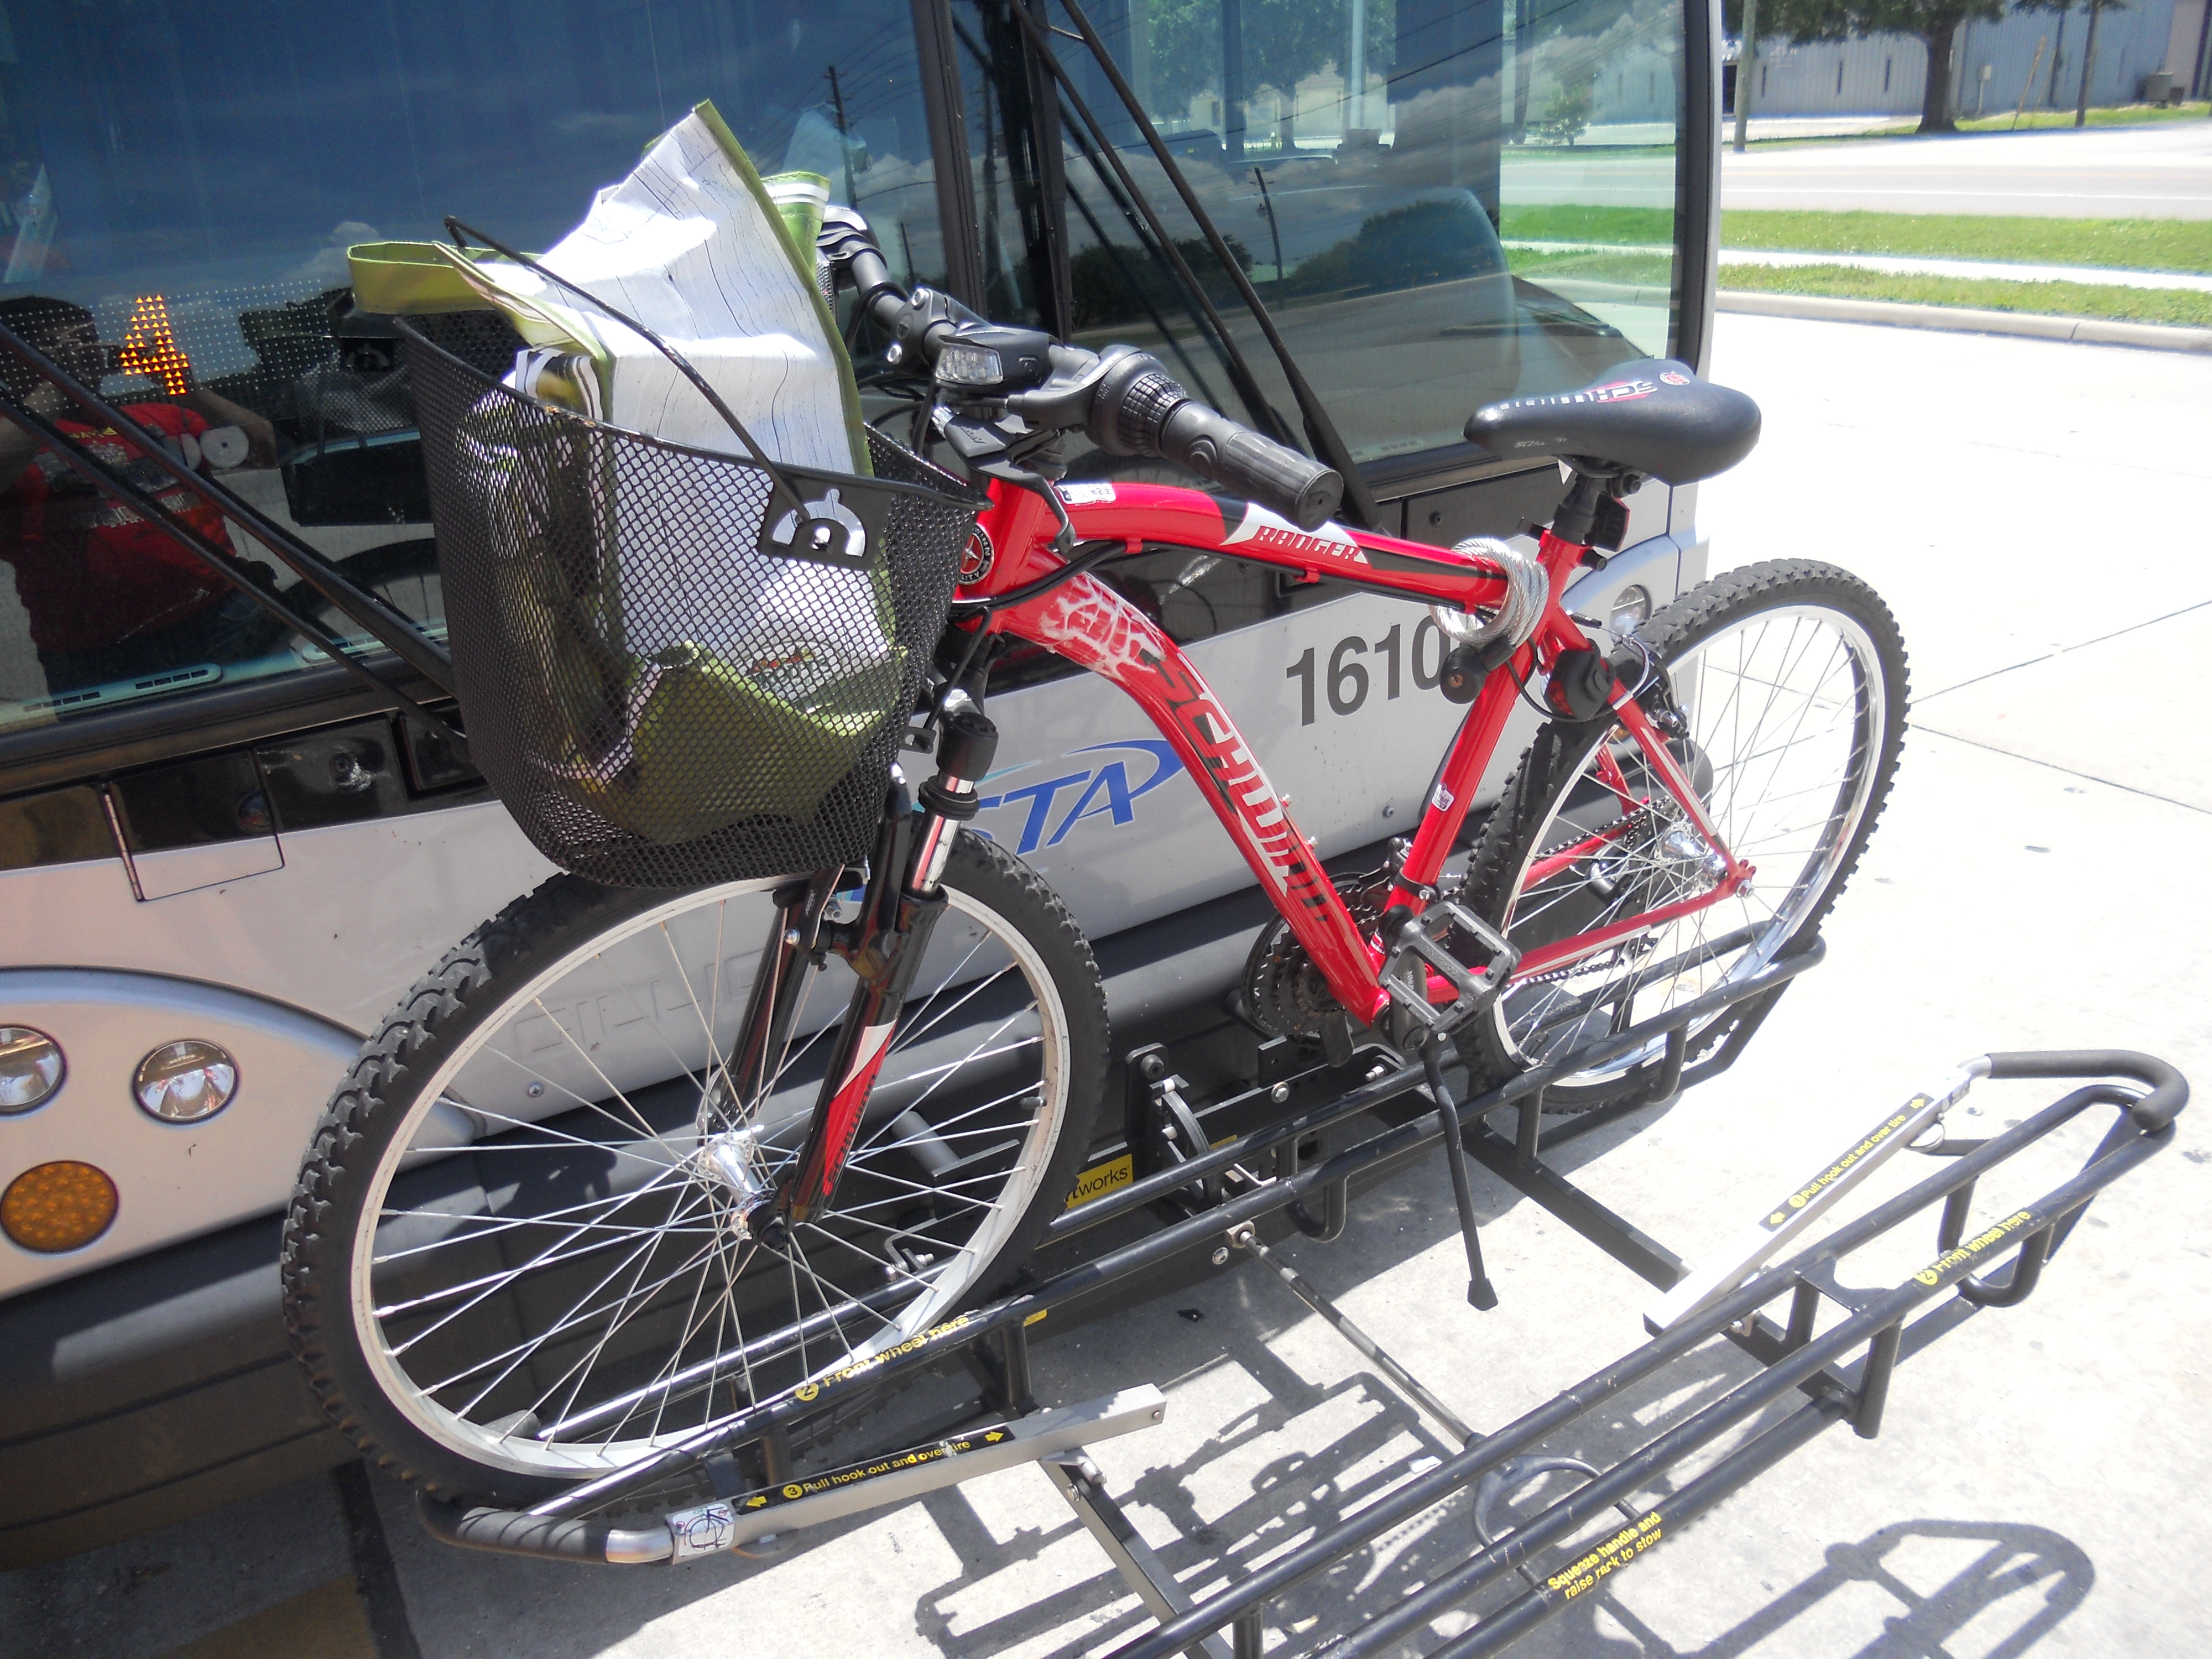
Below is a quick glance of how I load my bicycle onto the bike rack of a PSTA bus. You can then read through the step-by-step instructions. Before the bus arrives at your stop, be sure to have your proper fare ready and step near the curb with your bike with you. It is a general courtesy to notify the operator of your bike before loading it onto the bike rack of the bus.
Loading your bike
Using the bike rack on the front of the bus can look intimidating at first, but it’s a very simple process.
Before loading your bike onto the bike rack of the bus, you want to first and foremost, make sure that the bus has made a complete stop. Once the bus has stopped, you will want to make eye contact with the bus operator to signal to him or her that you are going to load your bike onto the rack.
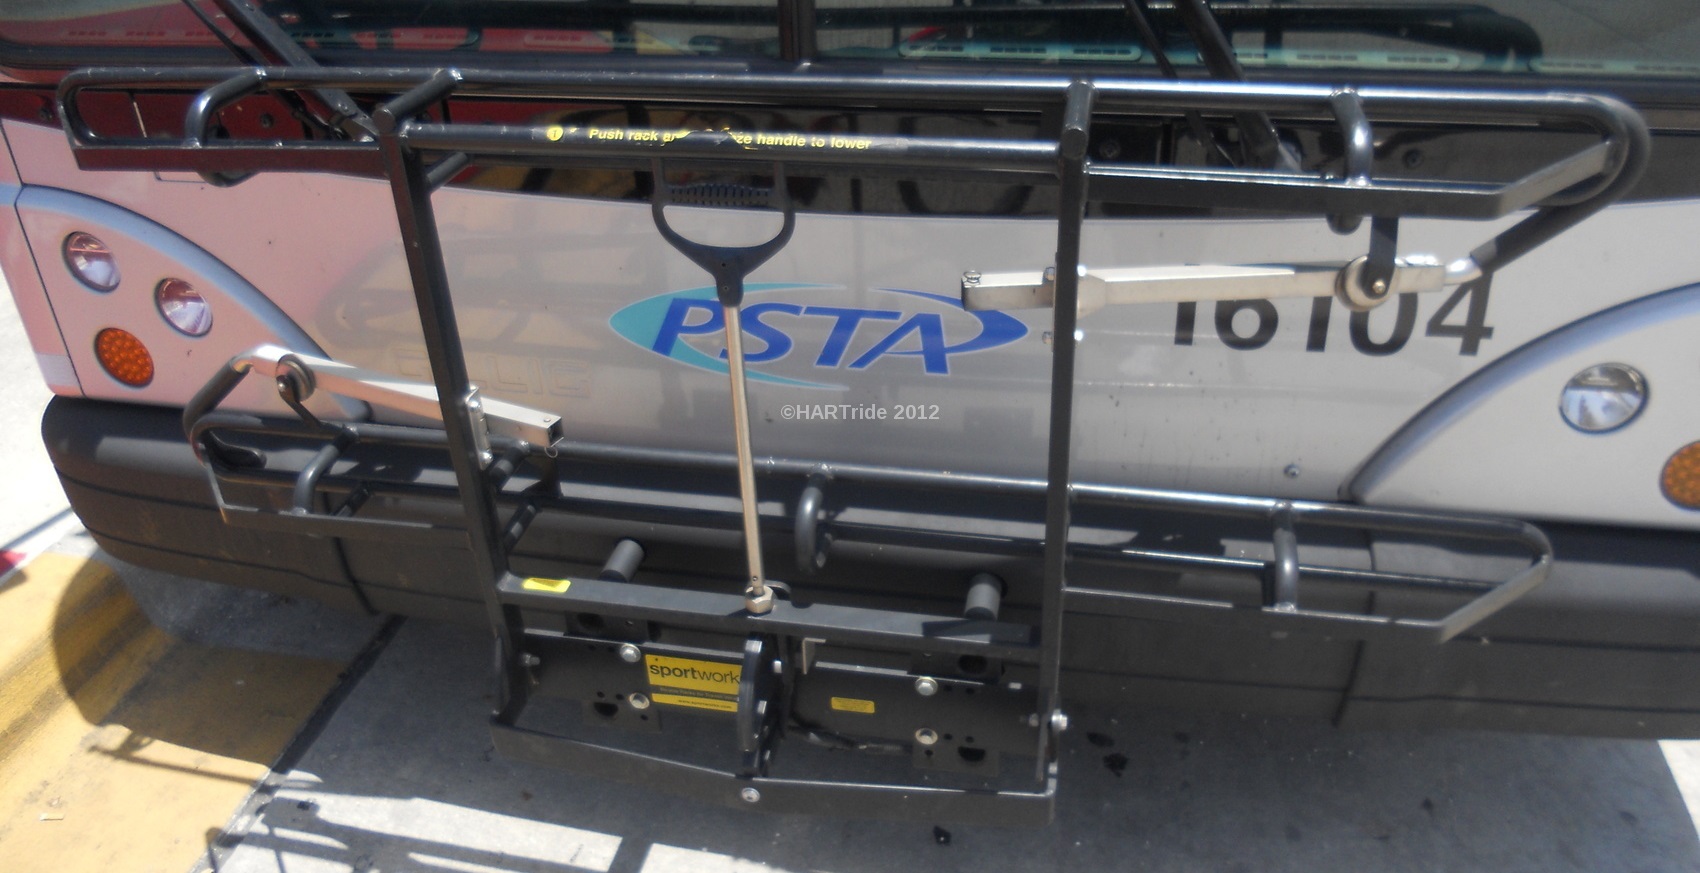
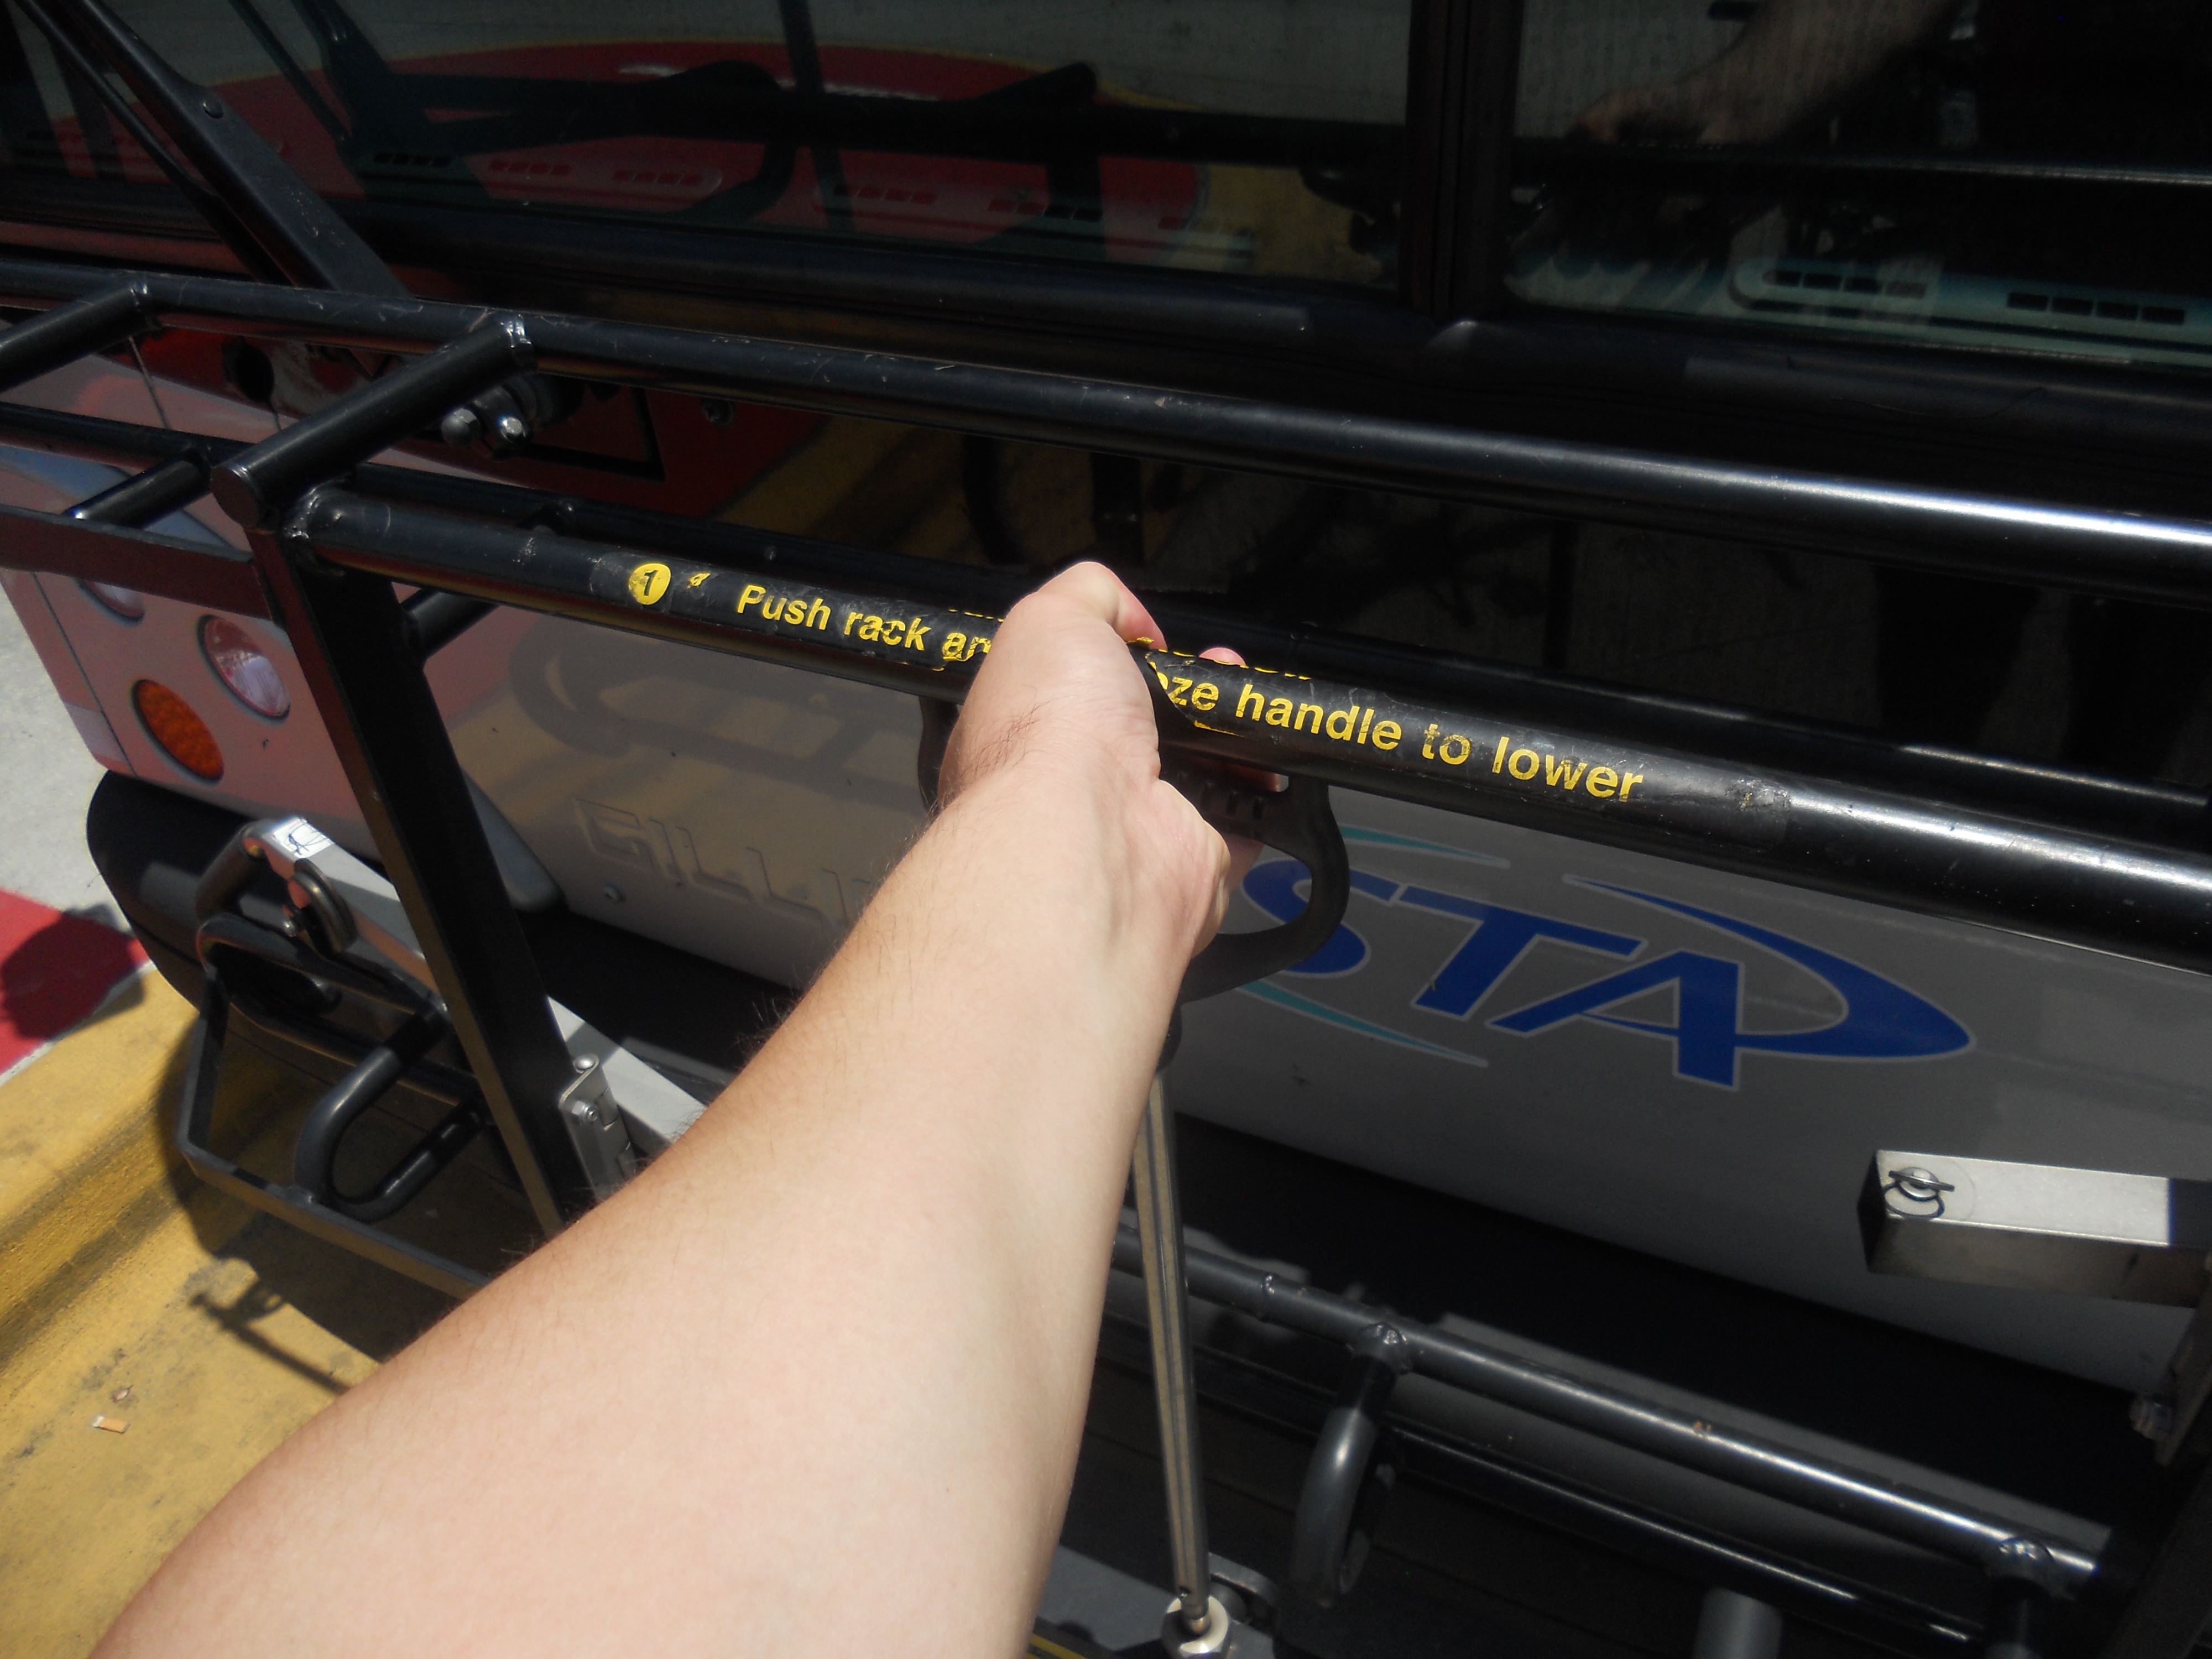
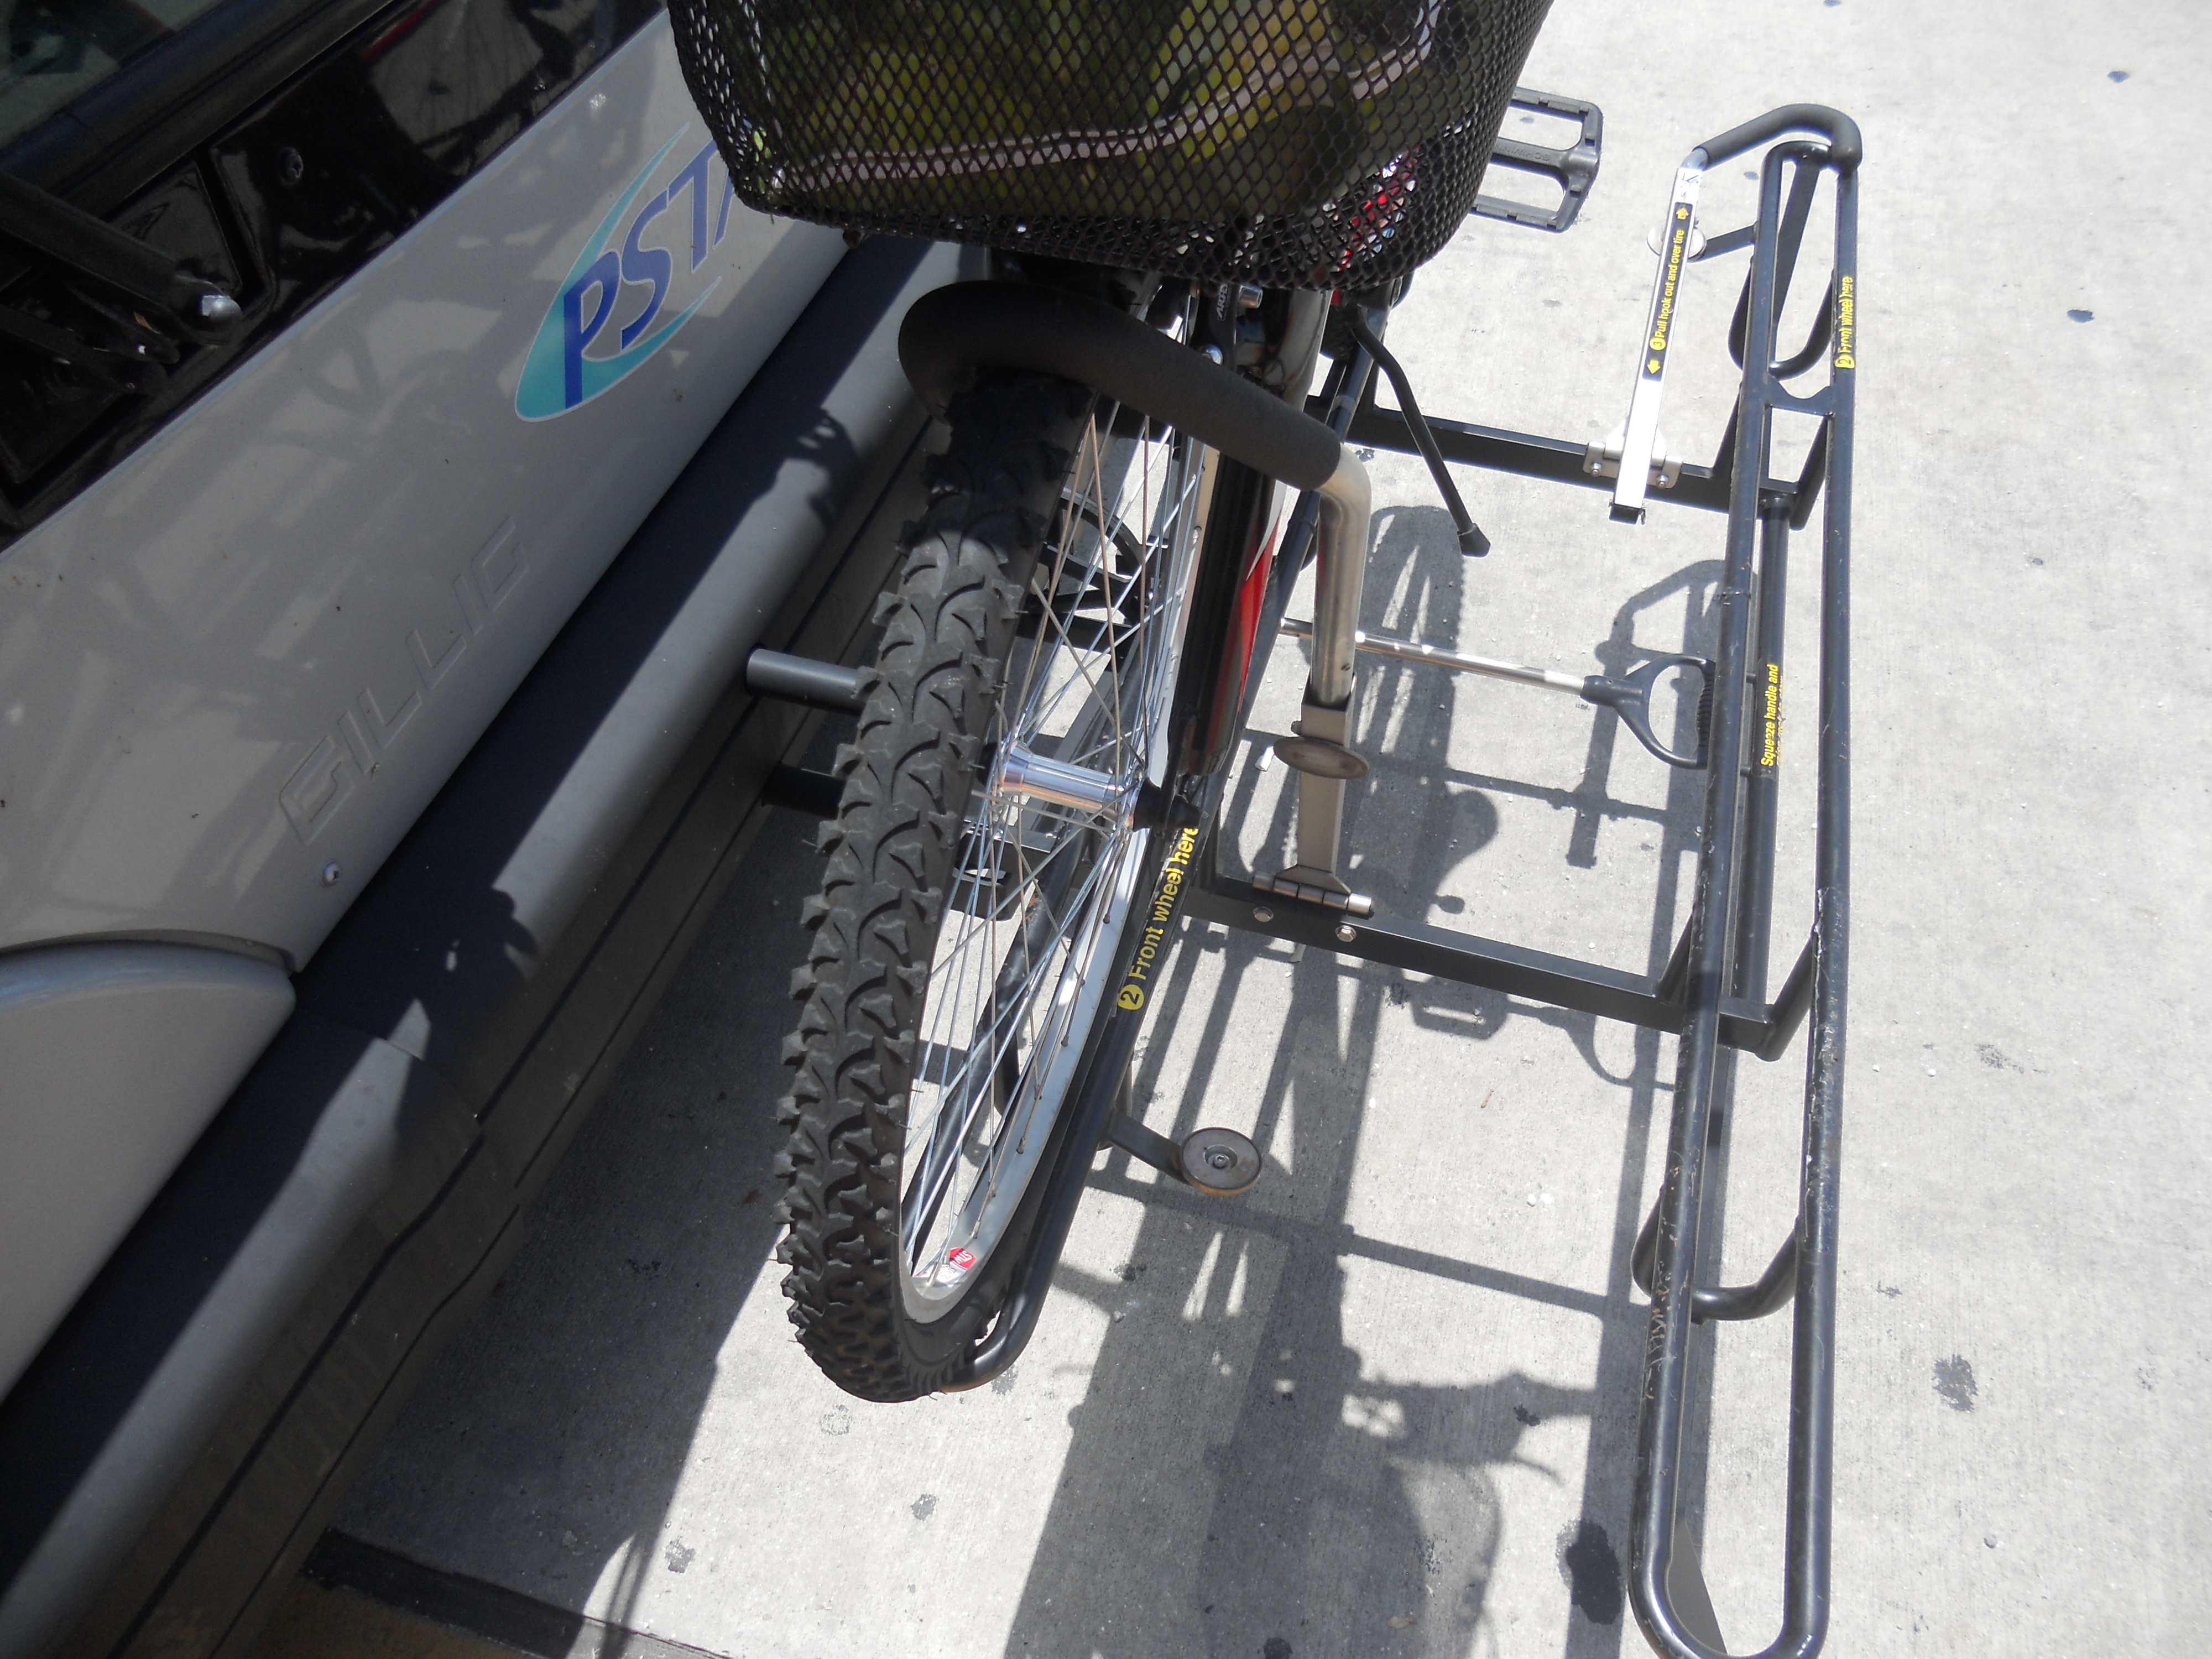
One of the first things you should notice when looking at the bike rack is the handle towards the front-center of the rack. Simply squeeze the handle and pull the rack outward towards you until it lays flat, parallel to the ground.
Once you’ve lowered the rack, it should look like the photo below…
You are now ready to load your bike! When loading, be sure to read the labeling on the rack carefully to know how to position your bike. You should see a sticker that indicates where to position the front wheel of the bike.
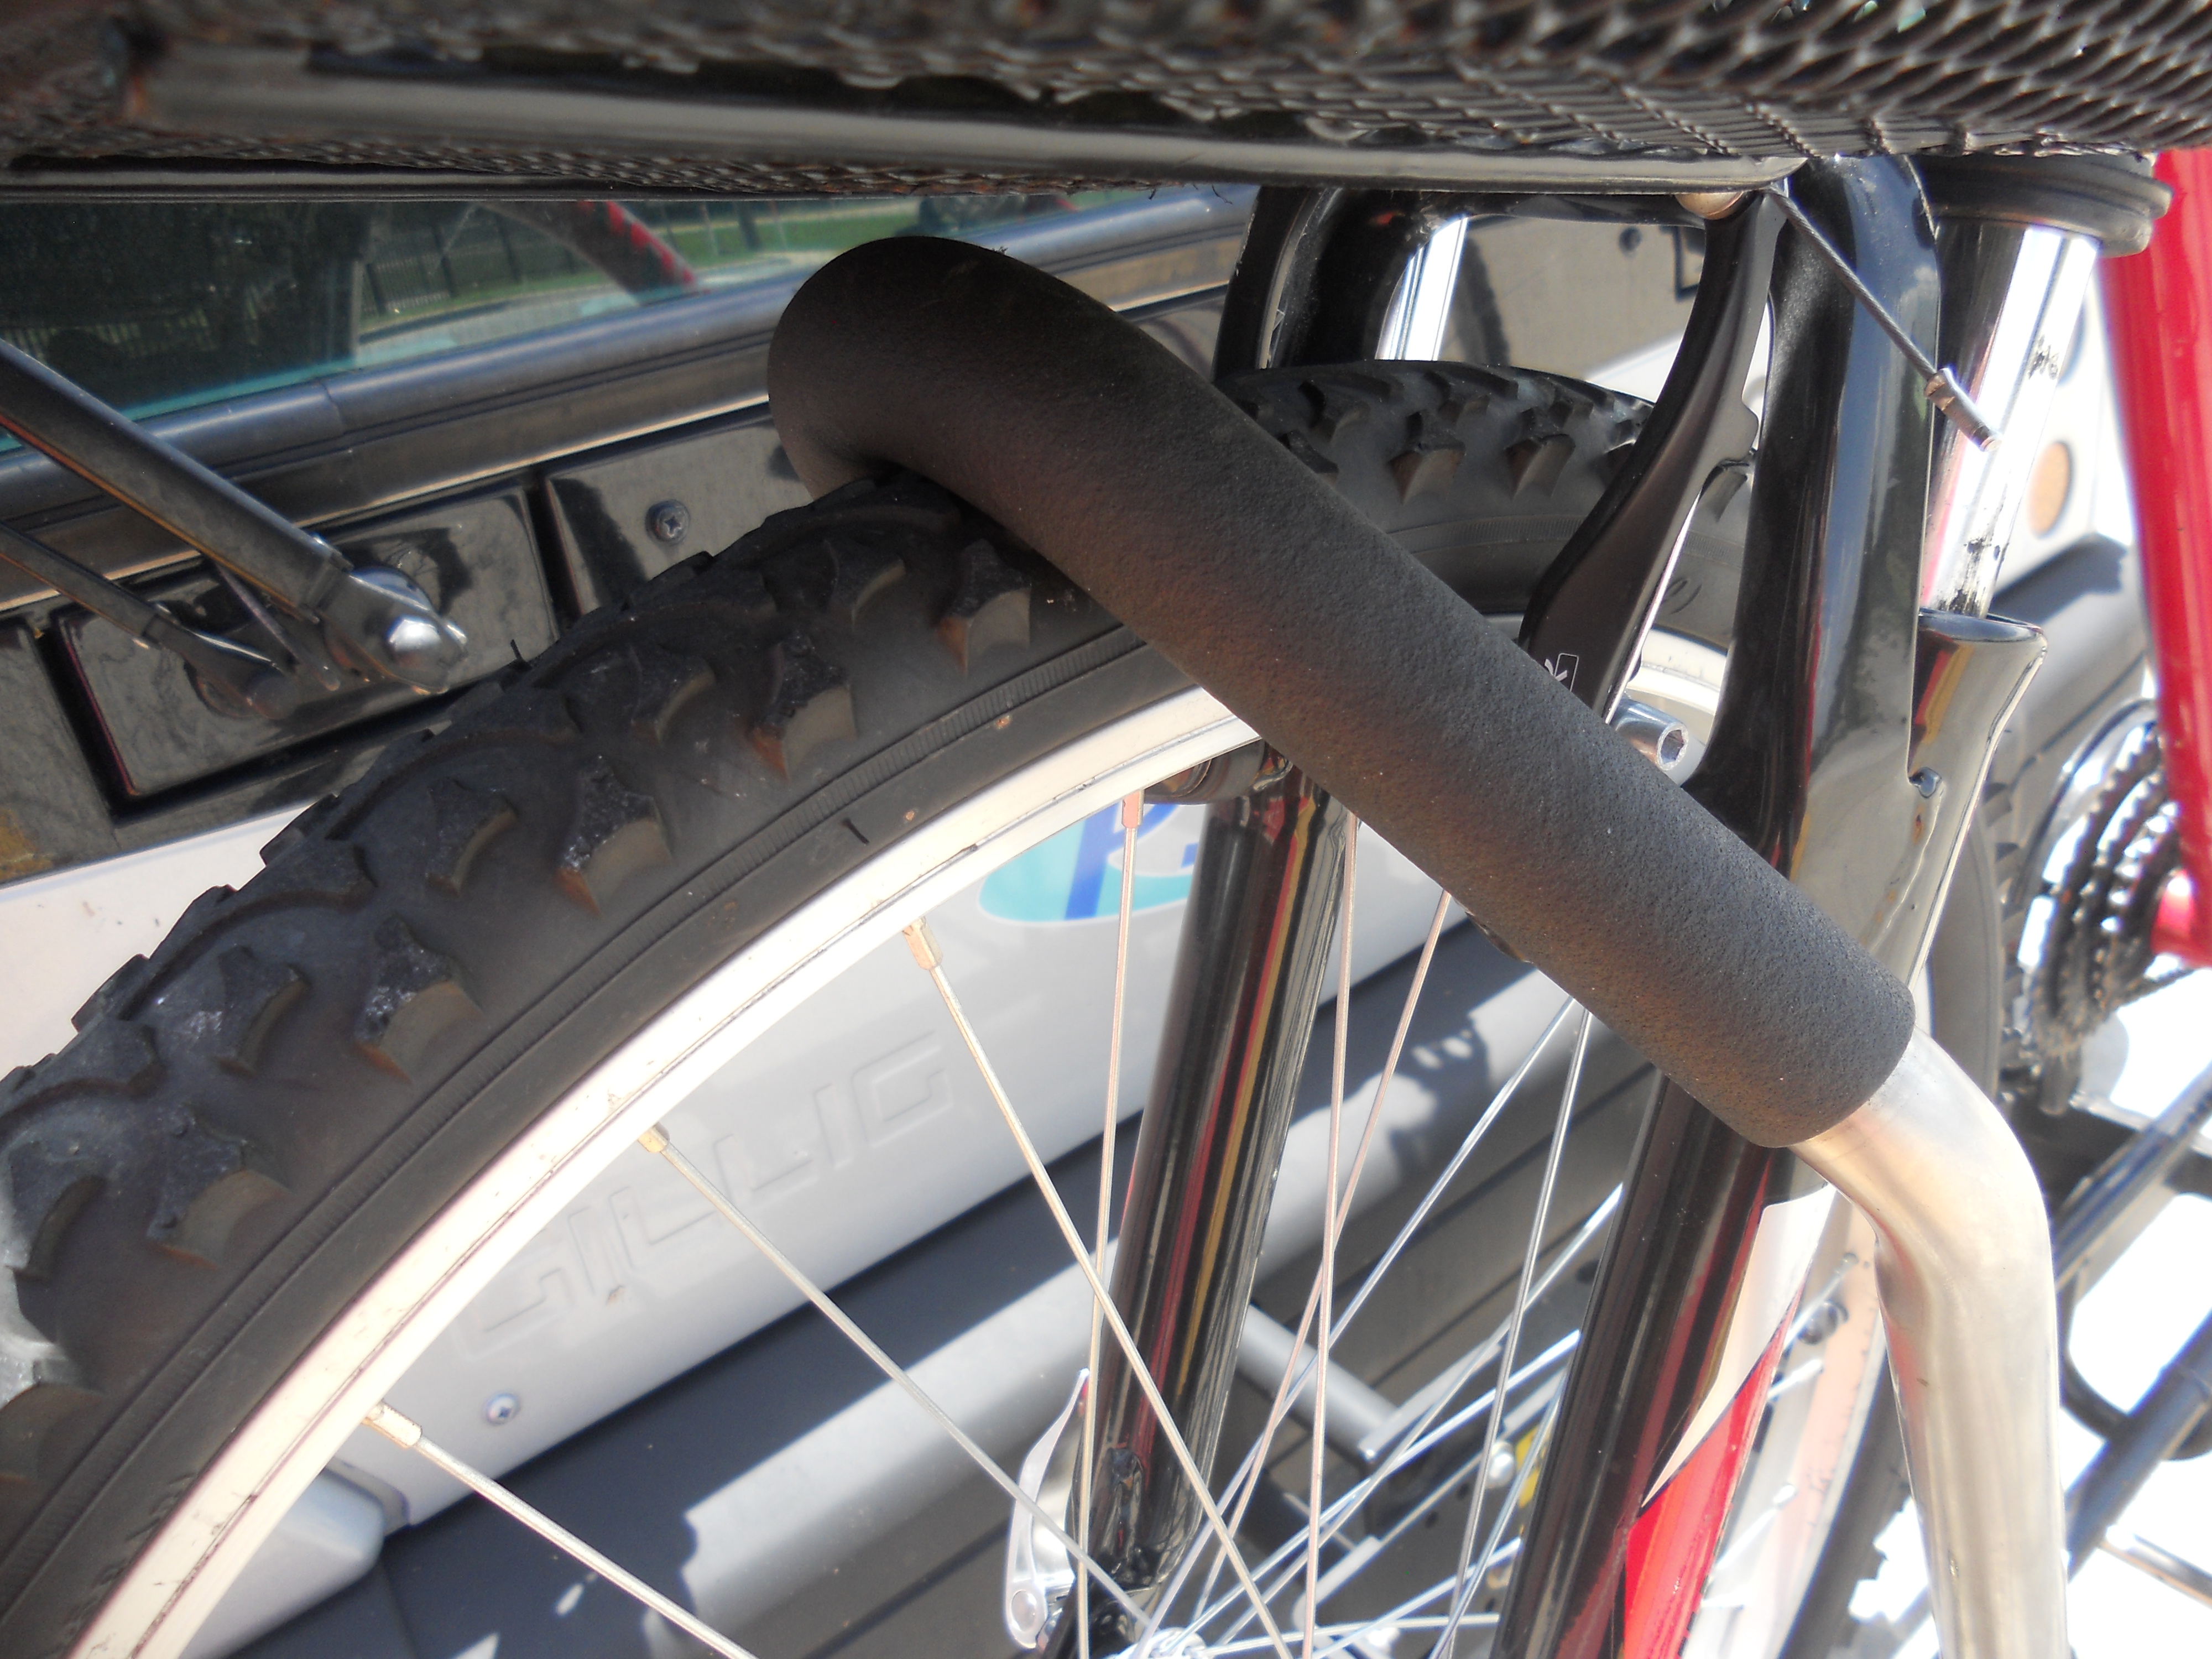
Before boarding the bus, you will need to make sure that your bike is secured. Each bike rack slot has a securement arm to do just that while the bus is in motion. You will want to look at the rack, towards the front wheel slot, to locate the arm.
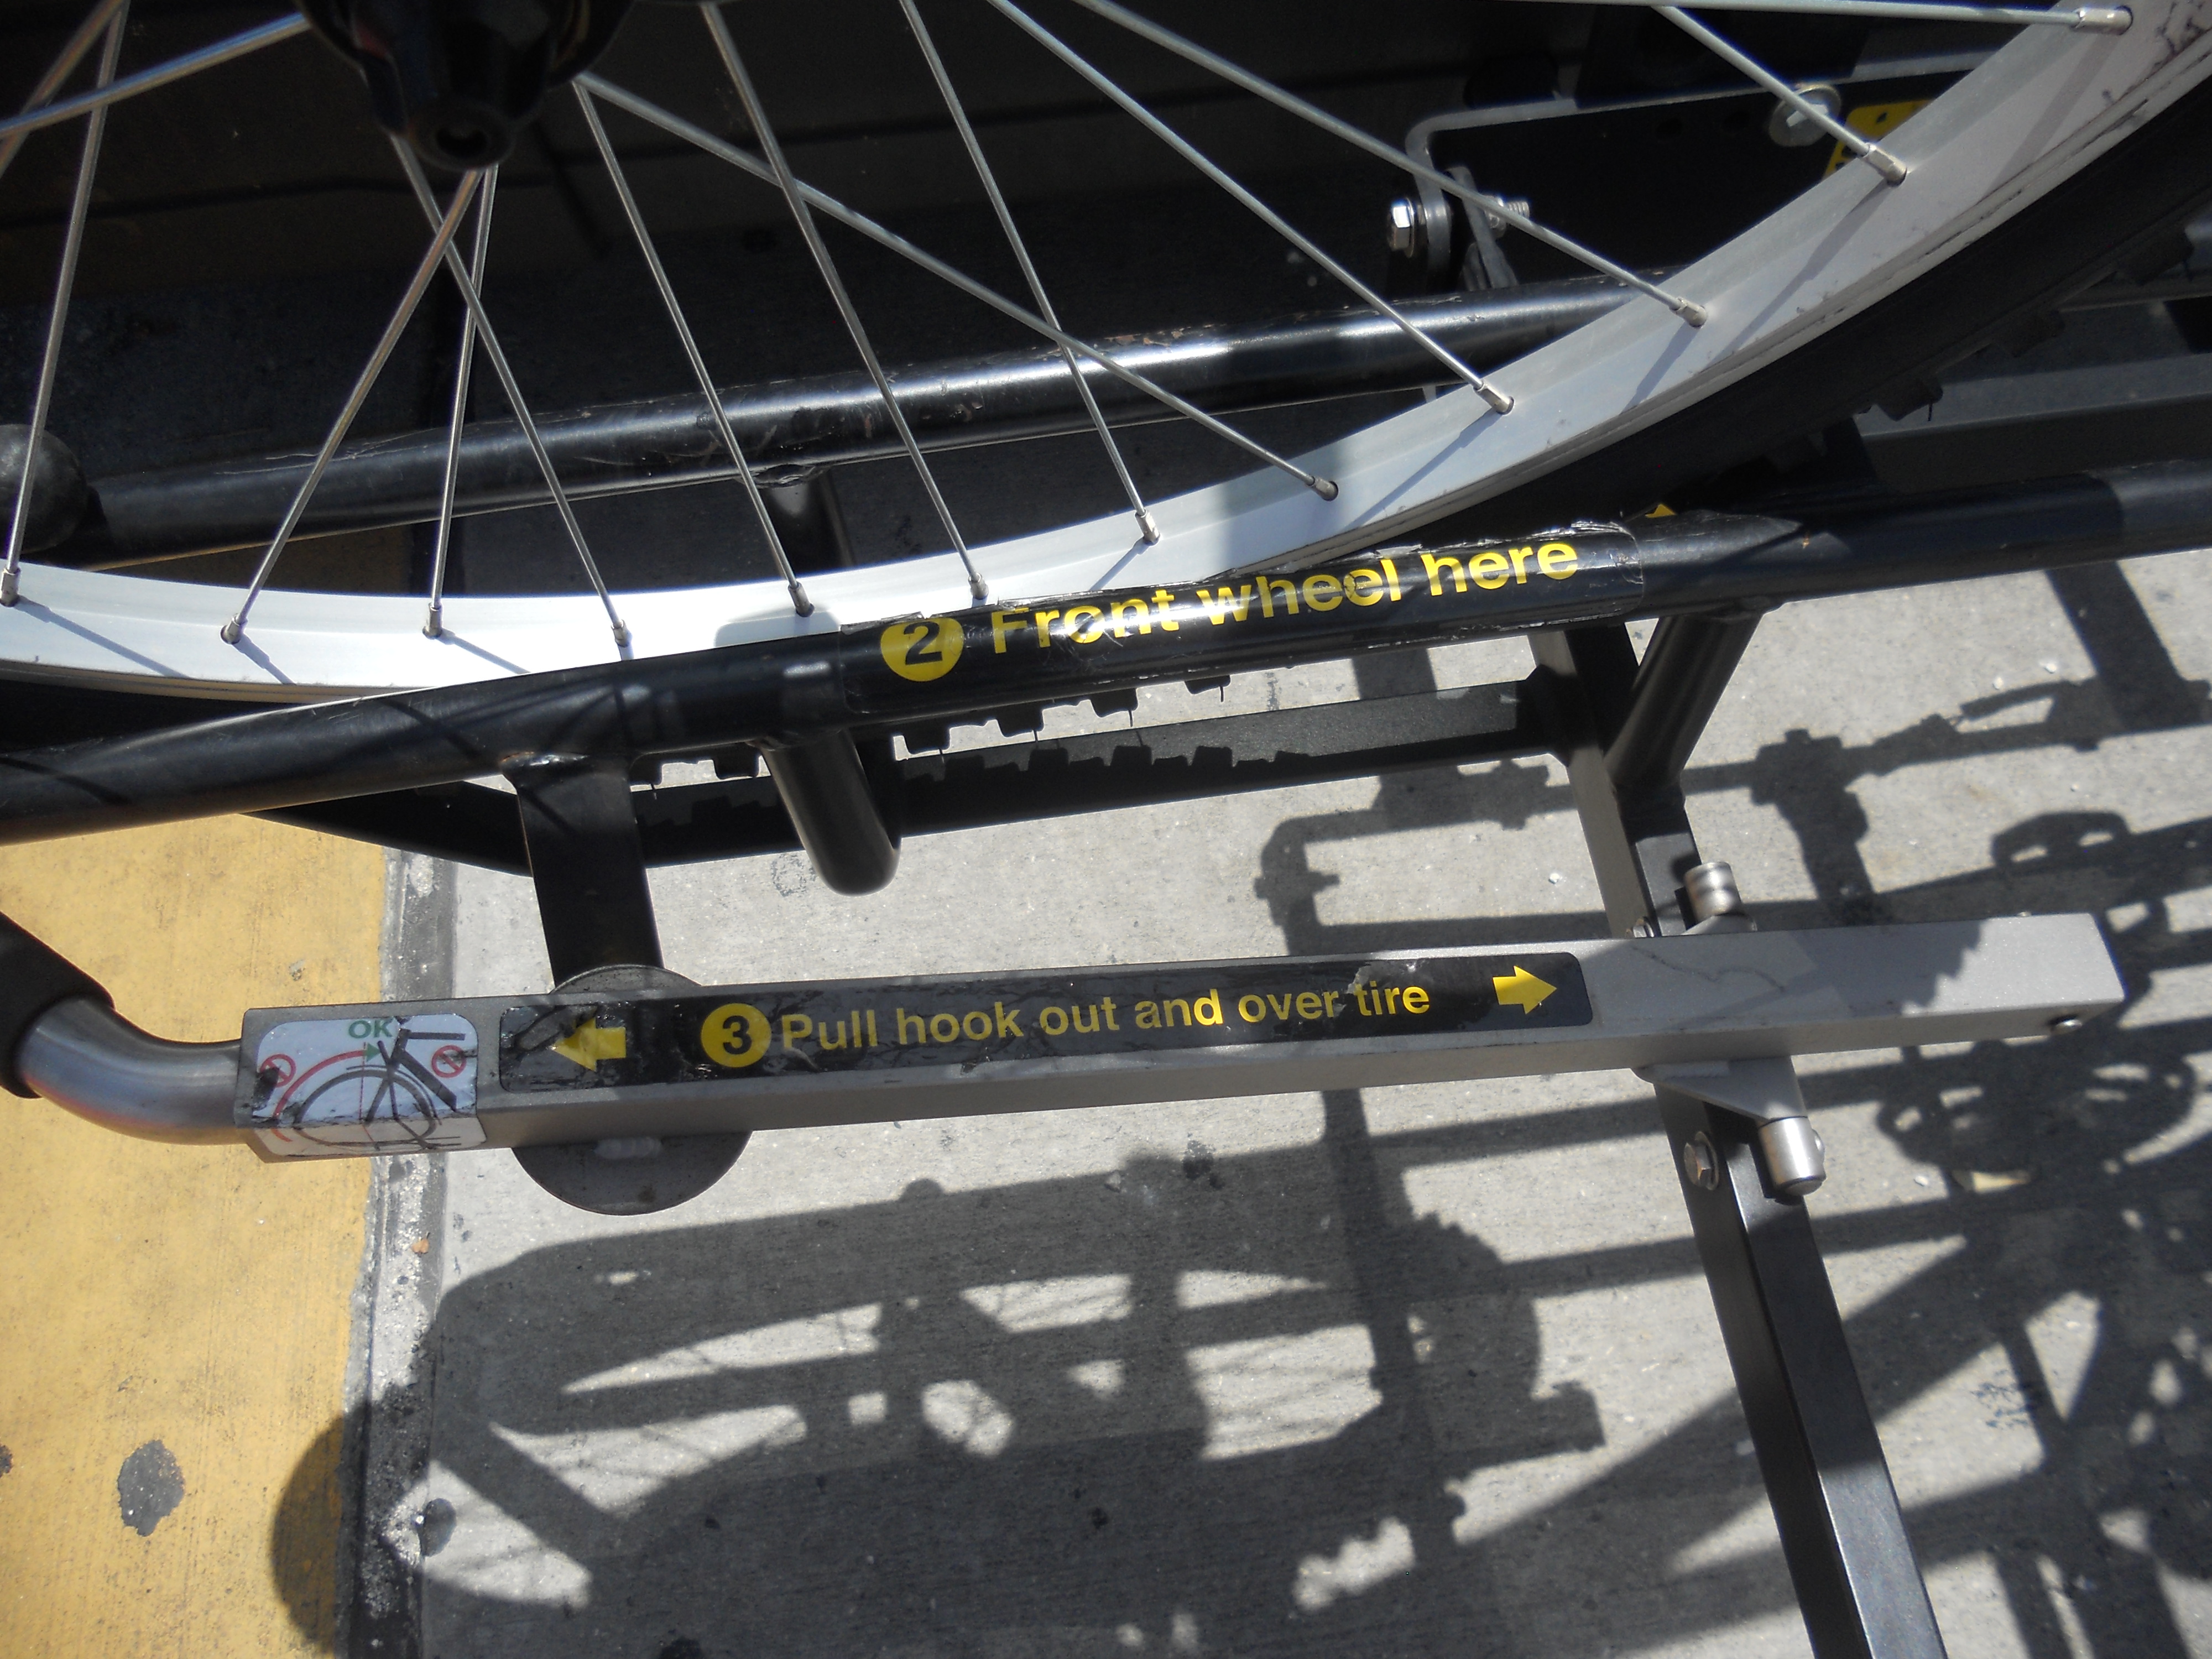
Once you’ve located the securement arm, grab the hooked portion and pull it outward, then upward over the front wheel of your bike.
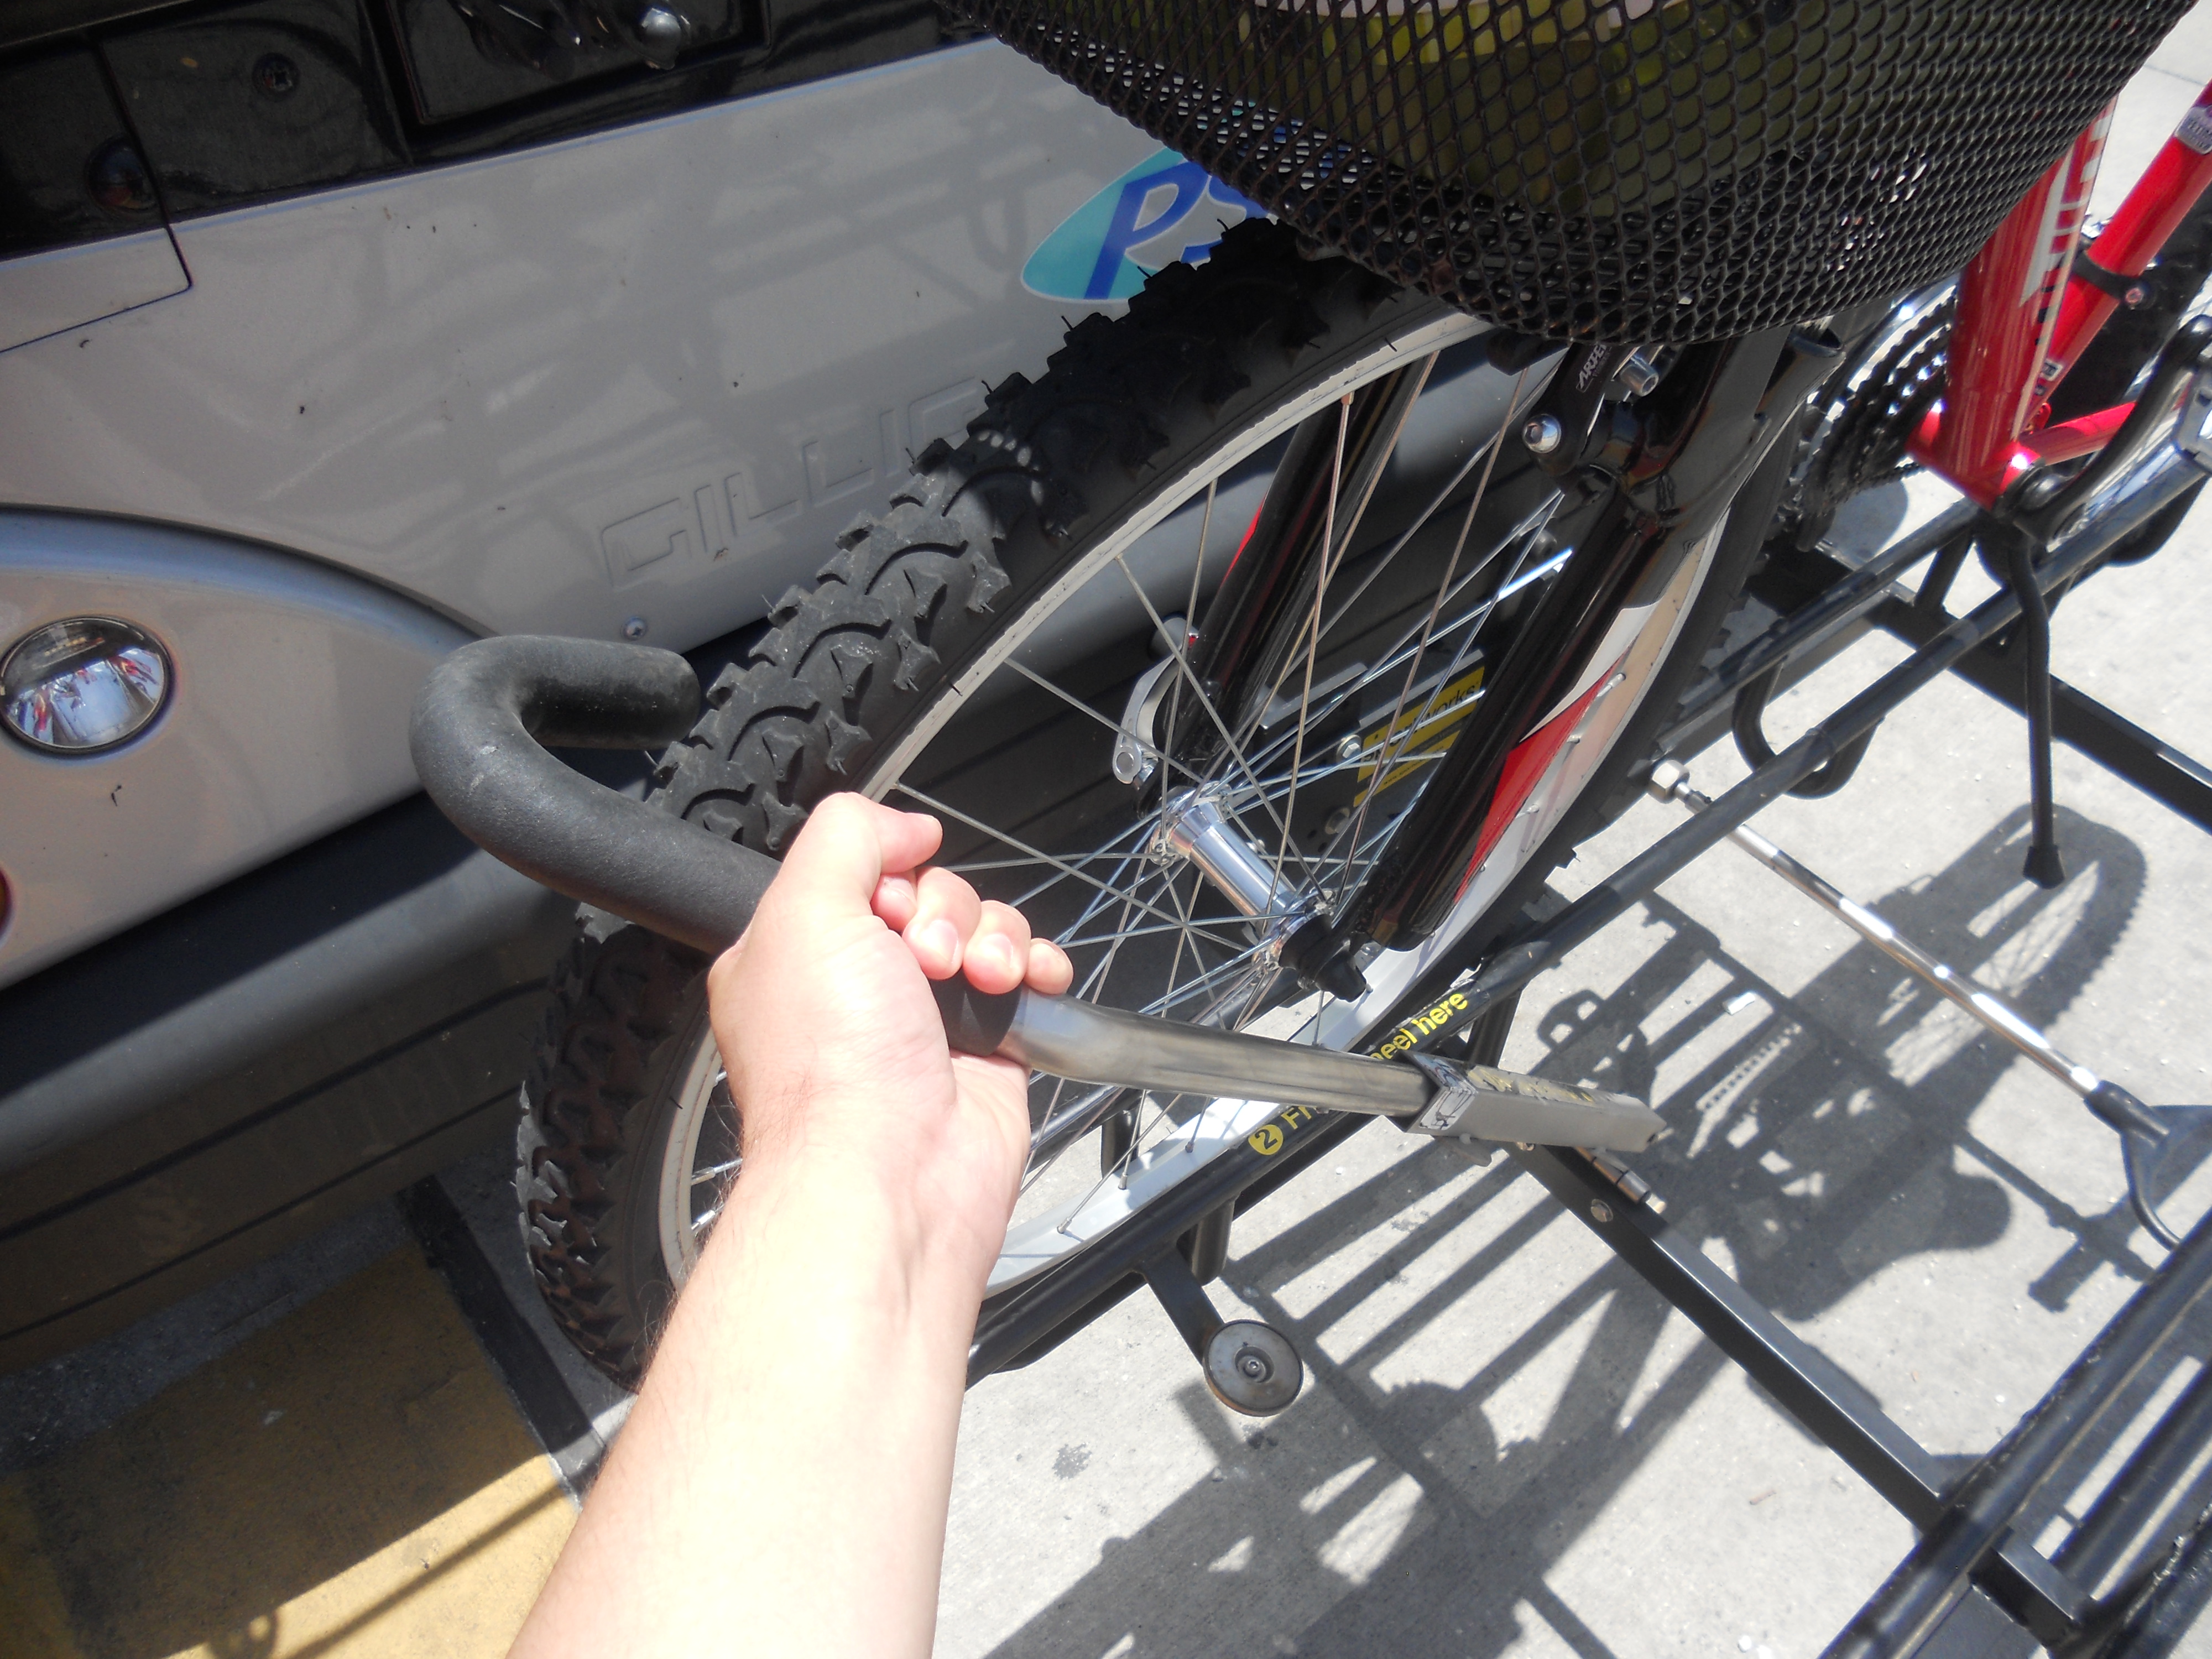
If performed successfully, the hooked portion of the arm should be secured over the top of your front bike wheel, in front of the frame, just like shown in the photo below.
Once your bike is fully secured to the bike rack, simply board the bus and pay your fare. While on board, you’ll want to sit close to the front of the bus so that you can keep watch of your bike while the bus is in motion. Being that I’ve had several bikes stolen when I was younger, I’m always doing my best to make sure that my bike is secured at all times.
When you’ve reached your destination stop, notify the operator that you’re going to remove the bike from the rack and exit the bus through the front door. Then, follow the above process in reverse – pulling and lowering the securement arm, removing your bike from the rack, then squeezing the center rack handle, and pulling the rack back up to its upright position.
Be sure that the rack has locked back into place before leaving the roadway. And always be sure to thank your bus operator and leave the roadway as quickly as possible so that the operator can proceed to his or her next stop.
If another customer wishes to load his or her bike onto the rack, then you can leave the rack down. If another bike is occupying the other slot(s) of the rack, please be considerate of the other customer’s bike so that you do not cause any inadvertent damage while loading or unloading your bike.
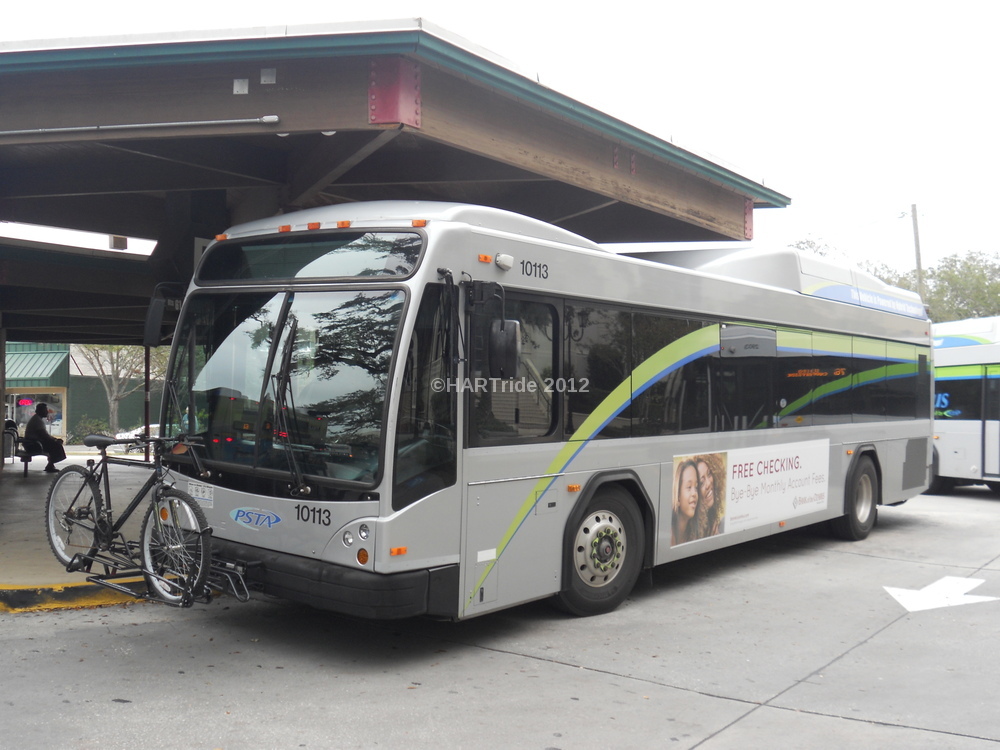
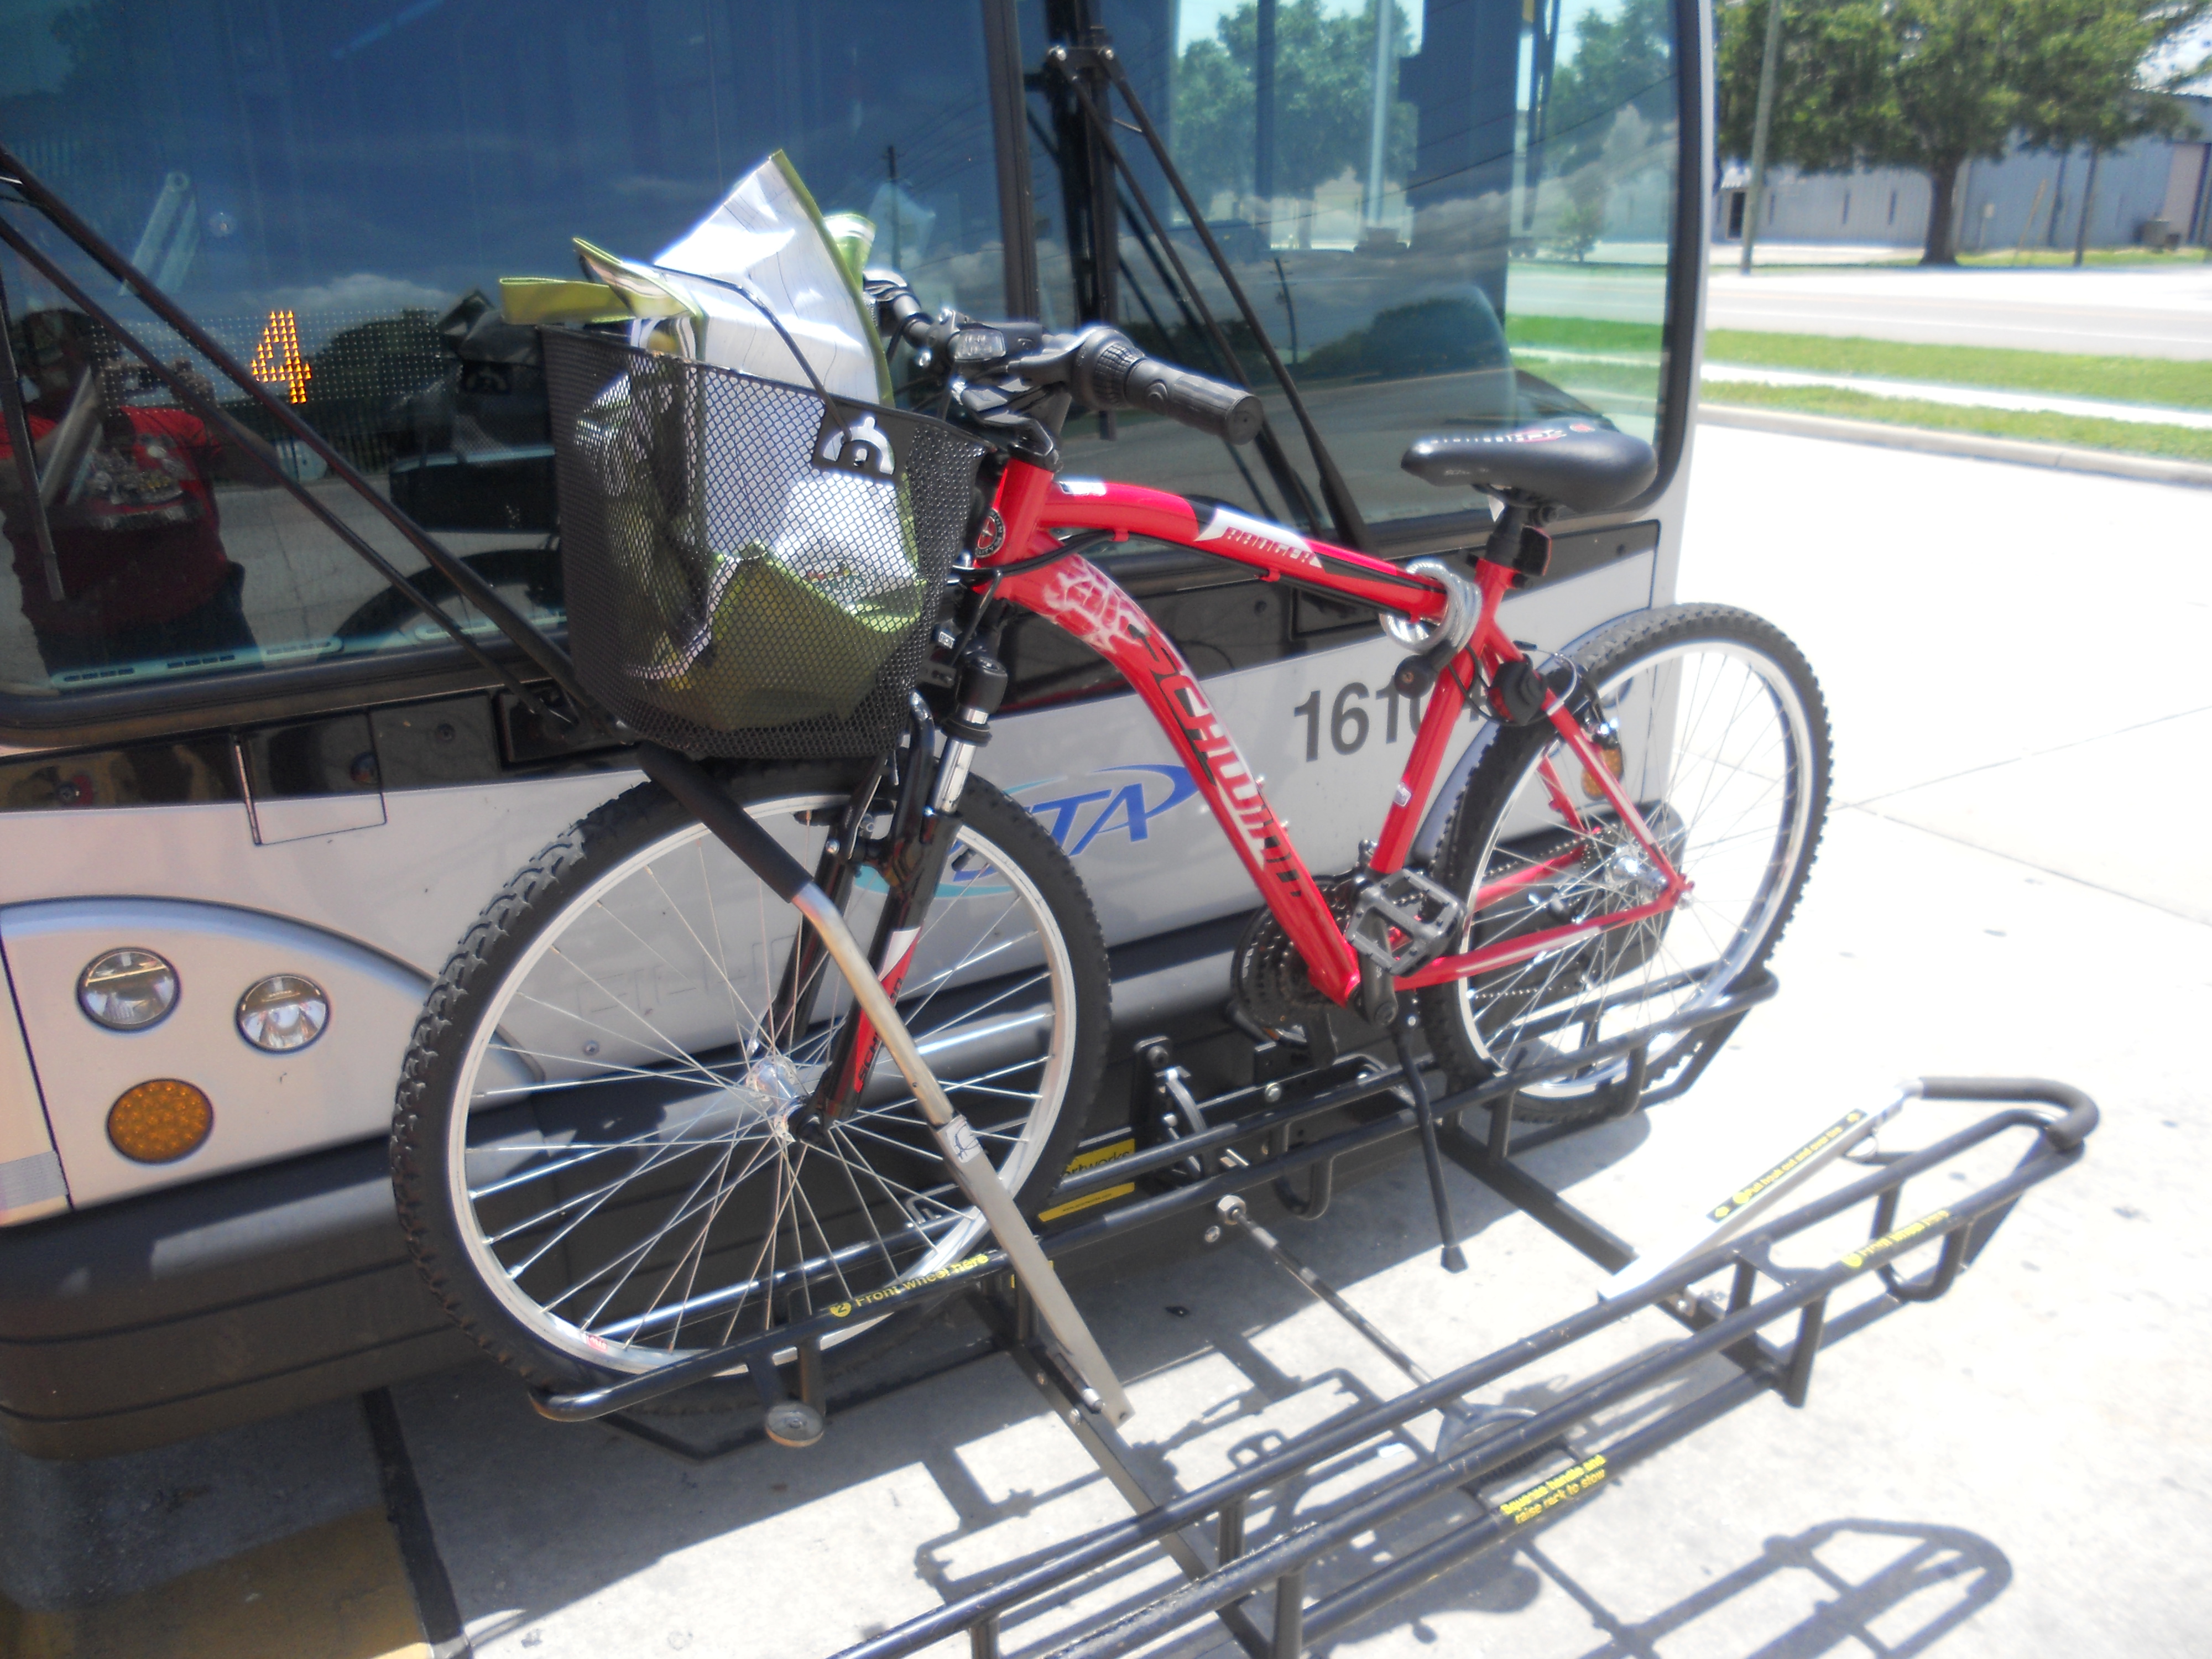
In the photo above, you might notice that the bike rack is somewhat different than the ones illustrated in the other photos. That’s because PSTA is among several transit agencies that use more than one type of bike rack. The manufacturer of the rack used on bus #10113 above is BykRak, while the manufacturer of the rack used in my other photos above is SportWorks. Each manufacturer will have a similar design for their racks, but there may also be fundamental differences – such as the securement arm and how it attaches to the front wheel of your bike. You will want to be mindful of this when loading and unloading your bike so that you do not cause inadvertent damage to the arm.
For some bus services – particularly many Bus Rapid Transit (BRT) routes like the Pinellas Suncoast Transit Authority (PSTA) SunRunner – buses may be equipped with interior bike racks for customers to use. I currently don’t have a video demonstration of my own on these, but here’s PSTA’s video to provide a basic idea on how to load & unload bikes onto/from the rack.
Bikes on Trains
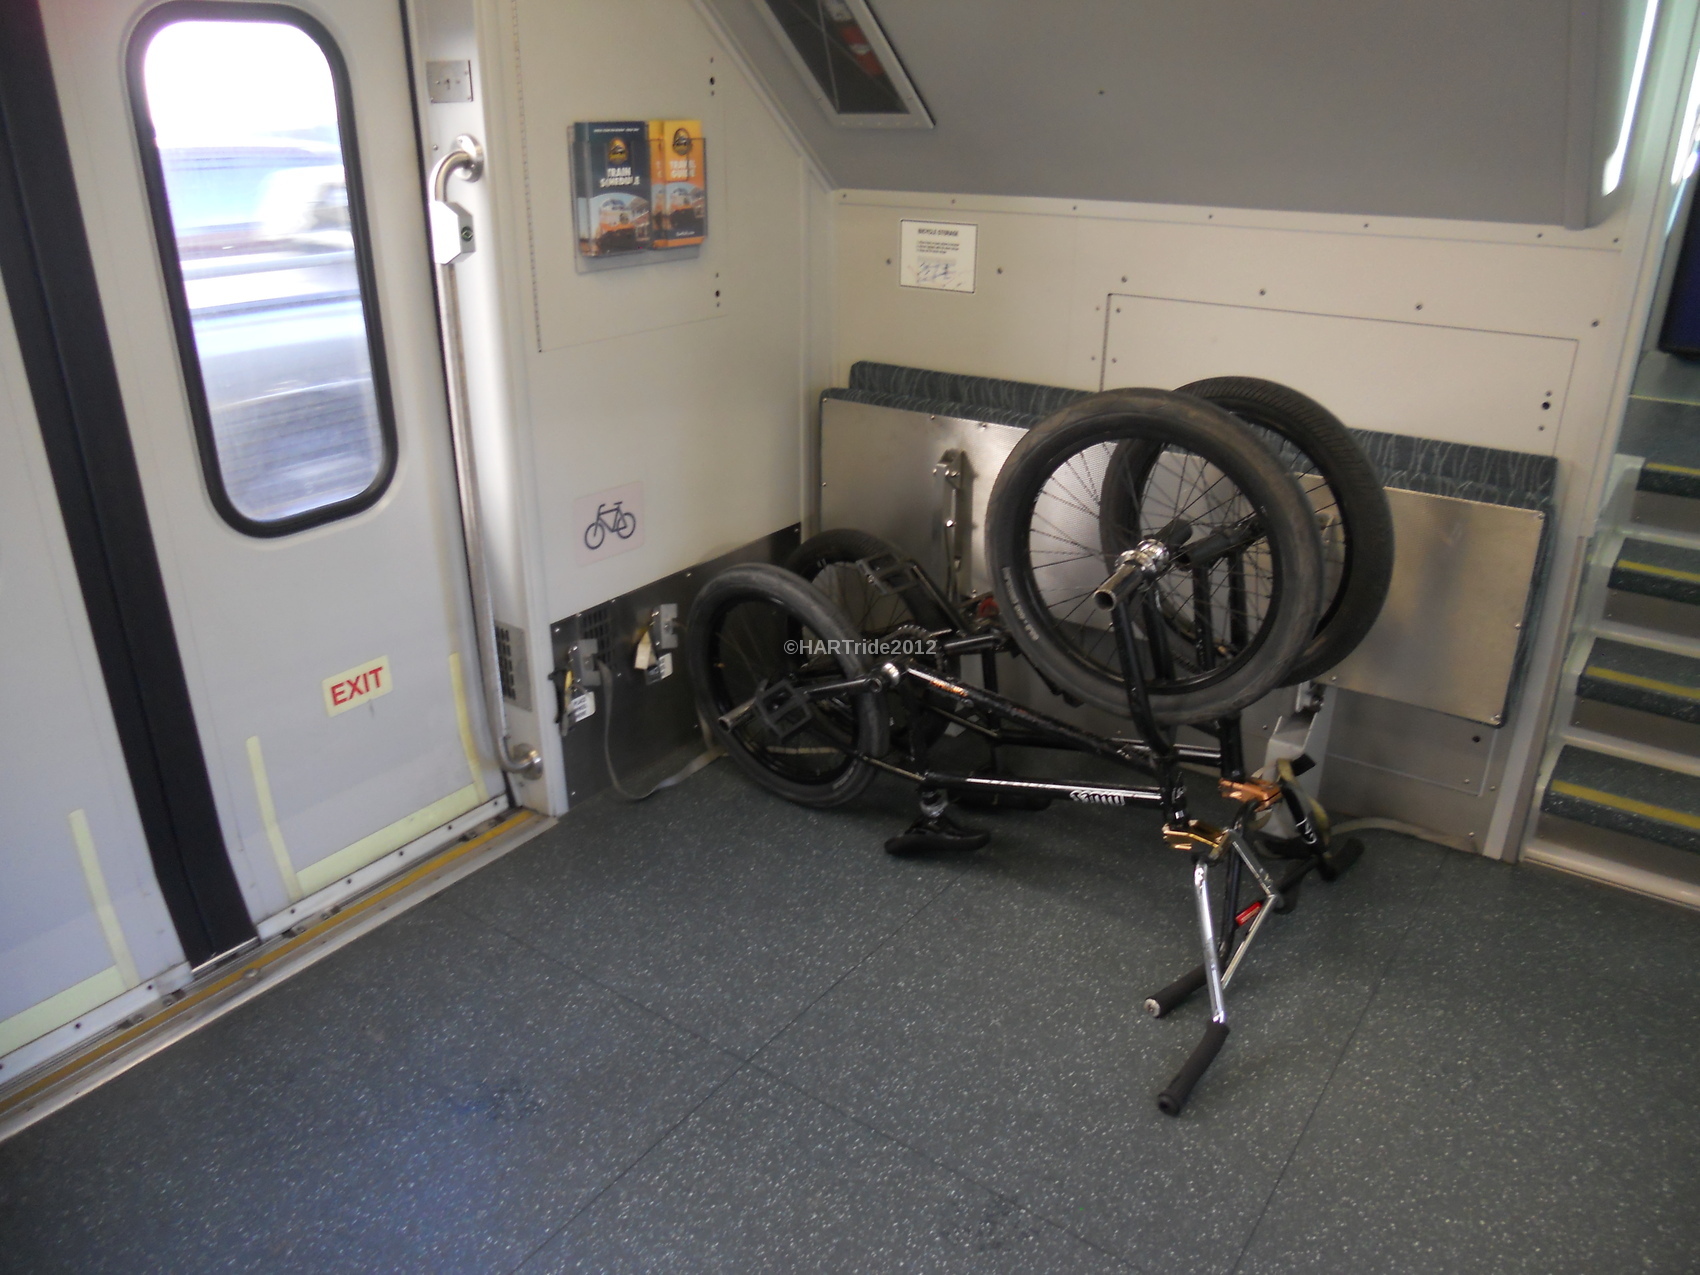
Many transit agencies that operate subway, light rail, or commuter rail systems will also allow customers to bring their bikes with them while on board a train. Specific rules may vary between agencies, including whether an on-board bike rack is available. Generally, older trains will not have on-board bike racks available – so if you’re allowed to take your bike with you, you’ll need to make sure that you hold your bike securely and keep all aisles and doors clear.
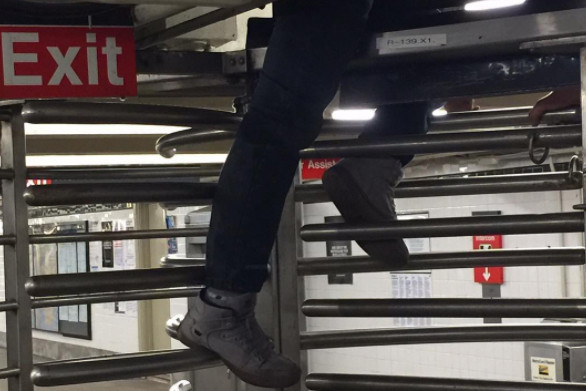
Accessing rail lines that do not utilize traditional fare gates or turnstiles are usually not an issue if you have your bike with you. However, accessing systems that do use such mechanisms can be very challenging and intimidating. In these situations, never attempt to lift your bike over a turnstile. Instead, utilize the service swing gate to access the rail platform. Always carry your bike up and down stairways and use elevators when they are available. Do not attempt to carry your bike onto an escalator, as you may wind up easily falling on the moving steps – which can result in serious injury or even death.
If a transit agency staff member or security guard is visible, it is generally advised that you notify them first so that they may assist you in getting your bike to and from the platform area. On older subway systems (like the New York City Subway), some entrances and exits may be configured in a manner by which entering or exiting the platform area with a bike may be impossible (for instance, the station exit only features a full-height revolving gate with metal bars). In these cases, simply proceed to the next available station that has a service swing gate.
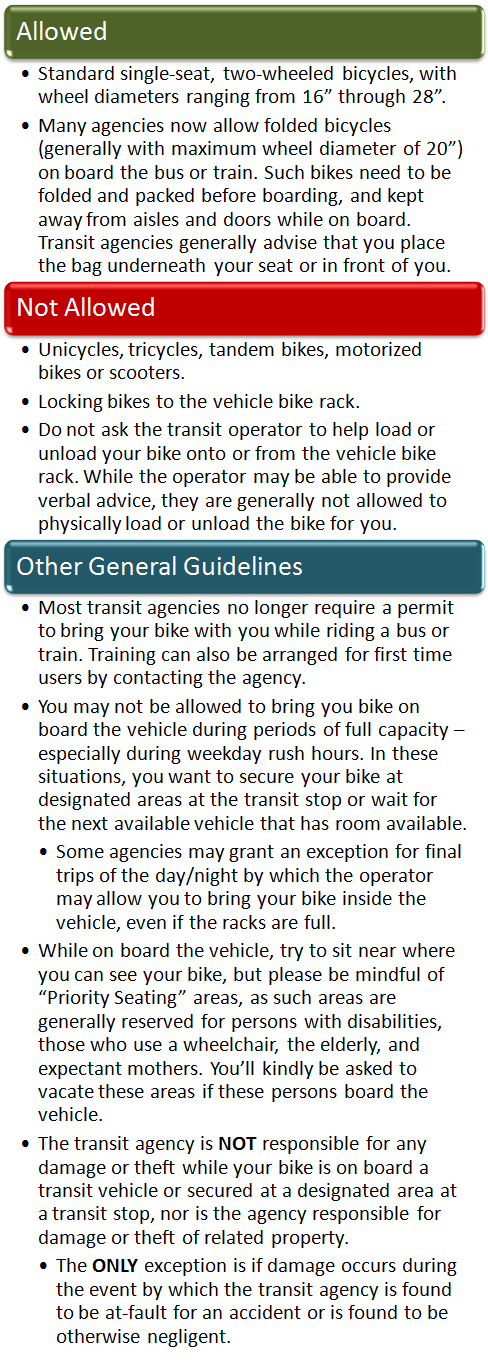
General Rules
While specific rules regarding bikes on transit vehicles may vary between transit agency, below are the general guidelines to follow when taking your bike with you on your transit journey.
A note regarding electric bikes (a.k.a. e-bikes)
With e-bikes becoming more common, transit agencies may have different rules & regulations about acceptance of e-bikes on board transit vehicles. Please be sure to check with your respective agency to verify if you’re able to bring your e-bike with you before leaving.
In addition to the above, do your best to not create a situation by which you may be denied boarding because your bike is suddenly considered a safety hazard. Always be considerate of those around you and wait for exiting customers to leave the transit vehicle before boarding. Always keep doors and aisles clear, properly secure your bike, and follow instructions given by transit agency staff, security guards, and law enforcement officers. But above all, enjoy your transit journey with your bike close by!
Connect with the Global Transit Guidebook!
Be sure to bookmark: http://globaltransitguidebook.com

NYCTransit allows people to bring their bikes in their subway trains. Unfortunately, there are very few bike racks on New York City buses (Staten Island), or none at all. The City is continuing an experimental project involving bike racks on city buses, so hopefully, someday, this could become a reality for bike owners who ride MTA buses.
Hi Letticia, I was heavily surprised to see the NY MTA buses without bike racks. I do hope that the agency will eventually add them to their buses, especially with what I call (L) from Hell on the horizon.